Art, Kindergarten
glean information from the environment, using the five senses[1.A]
identify colors, textures, forms, and subjects in the environment[1.B]
create artworks, using a variety of colors, forms, and lines[2.A]
identify simple subjects expressed in artworks[3.A]
express ideas about personal artworks[4.A]
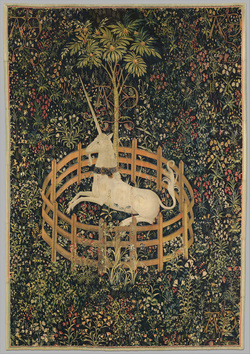
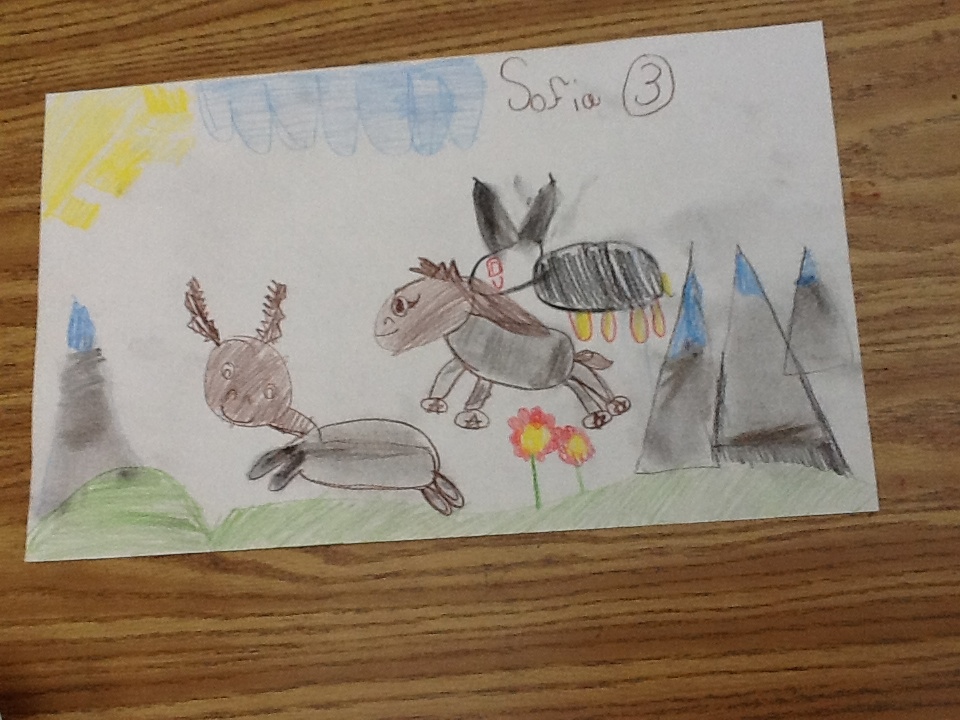
Title of Project: Fantasy Creatures
Lesson Content Objective(s):
Instructional Plan:
Engage: Read Puff the magic Dragon.
Explore: Discuss fantasy creatures that people in medieval times wrote about and believed where real.
Explain: Talk about what they are and how they are not real. Students make picture telling a story with their fantasy creature.
Eleborate: Students choose between a dragon or a unicorn. Then make a story using their fantasy creature through pictures.
Assessment:
Evaluate: Students show their pictures to the class and tell what their story is.
glean information from the environment, using the five senses[1.A]
identify colors, textures, forms, and subjects in the environment[1.B]
create artworks, using a variety of colors, forms, and lines[2.A]
identify simple subjects expressed in artworks[3.A]
express ideas about personal artworks[4.A]
Title of Project: Fantasy Creatures
Lesson Content Objective(s):
- Students will be able to create fantasy animals that show movement in a picture.
- Students learn about art that tells a story.
- Students will be able to create lines and shapes.
- Students will identify their basic shapes and lines.
Instructional Plan:
Engage: Read Puff the magic Dragon.
Explore: Discuss fantasy creatures that people in medieval times wrote about and believed where real.
Explain: Talk about what they are and how they are not real. Students make picture telling a story with their fantasy creature.
Eleborate: Students choose between a dragon or a unicorn. Then make a story using their fantasy creature through pictures.
Assessment:
Evaluate: Students show their pictures to the class and tell what their story is.
Art, Kindergarten
identify colors, textures, forms, and subjects in the environment[1.B]
arrange forms intuitively to create artworks[2.B]
develop manipulative skills when drawing, painting, printmaking, and constructing artworks, using a variety of materials[2.C]
create artworks, using a variety of colors, forms, and lines[2.A]
identify simple subjects expressed in artworks[3.A]
relate art to everyday life[3.C]
express ideas about original artworks, portfolios, and exhibitions by peers and artists[4.B]
use prior knowledge and experiences to understand meanings in English.[ELP.1A]
speak using learning strategies such as requesting assistance, employing non-verbal cues, and using synonyms and circumlocution (conveying ideas by defining or describing when exact English words are not known).[ELP.1D]
use visual, contextual, and linguistic support to enhance and confirm understanding of increasingly complex and elaborated spoken language.[ELP.2E]
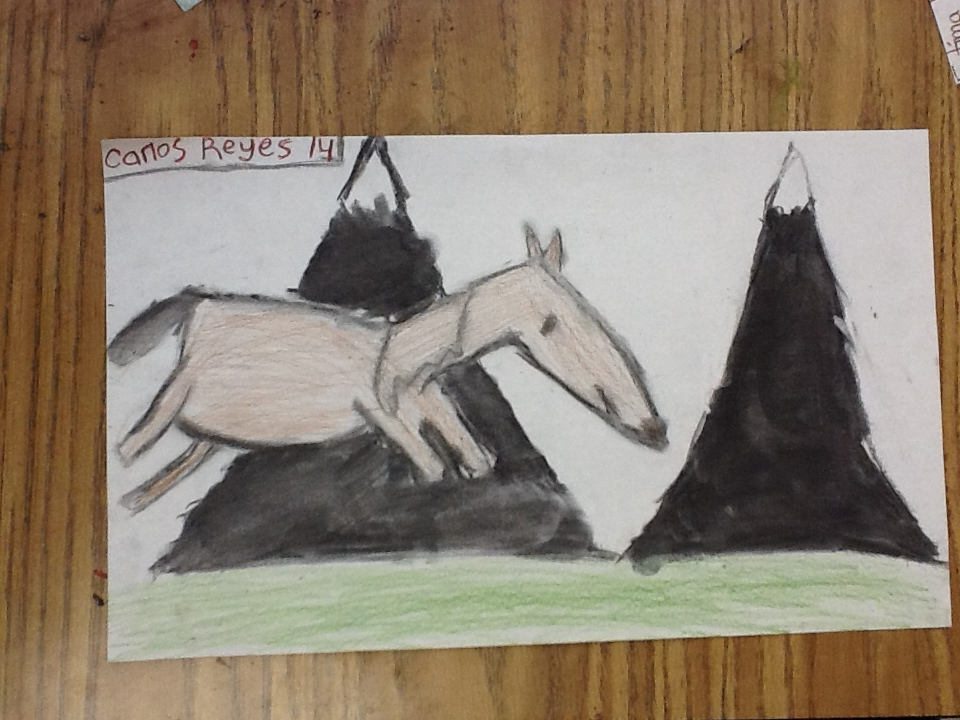
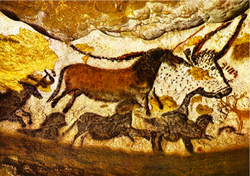
Title of Project: Ice Age Cave Man Drawing
Lesson Content Objective(s):
Instructional Plan:
Engage: Discuss prehistoric cave painting.
Explore: Read The Cave Painter of Lascaux by Robert Angelettl. Talk about the Cave paintings in Lascaux, France.
Explain: Discuss why cave men might have made cave paintings. Talk about cavemen and what they might have hunted. Discuss how most people draw cavemen with Dinosaurs but that they didn’t actually live during the same time period.
Eleborate:
Evaluate: Students show their landscape and discuss what they put in their landscape.
identify colors, textures, forms, and subjects in the environment[1.B]
arrange forms intuitively to create artworks[2.B]
develop manipulative skills when drawing, painting, printmaking, and constructing artworks, using a variety of materials[2.C]
create artworks, using a variety of colors, forms, and lines[2.A]
identify simple subjects expressed in artworks[3.A]
relate art to everyday life[3.C]
express ideas about original artworks, portfolios, and exhibitions by peers and artists[4.B]
use prior knowledge and experiences to understand meanings in English.[ELP.1A]
speak using learning strategies such as requesting assistance, employing non-verbal cues, and using synonyms and circumlocution (conveying ideas by defining or describing when exact English words are not known).[ELP.1D]
use visual, contextual, and linguistic support to enhance and confirm understanding of increasingly complex and elaborated spoken language.[ELP.2E]
Title of Project: Ice Age Cave Man Drawing
Lesson Content Objective(s):
- Students learn about Ice Age art.
- Students Learn about the Cave Painting of Lascaux in France.
- Students review about landscapes and horizon line students draw land and animals on land.
- Students review patterns and textures create patterns in their hand and smudge textures with charcoal.
Instructional Plan:
Engage: Discuss prehistoric cave painting.
Explore: Read The Cave Painter of Lascaux by Robert Angelettl. Talk about the Cave paintings in Lascaux, France.
Explain: Discuss why cave men might have made cave paintings. Talk about cavemen and what they might have hunted. Discuss how most people draw cavemen with Dinosaurs but that they didn’t actually live during the same time period.
Eleborate:
- Students draw cavemen onto their picture.
- Students make a landscape with a Ice Age design.
- They then place a pattern around their landscape.
Evaluate: Students show their landscape and discuss what they put in their landscape.

Art, Kindergarten
glean information from the environment, using the five senses[1.A]
identify colors, textures, forms, and subjects in the environment[1.B]
create artworks, using a variety of colors, forms, and lines[2.A]
arrange forms intuitively to create artworks[2.B]
identify simple subjects expressed in artworks[3.A]
share ideas about personal artworks and the work of others, demonstrating respect for differing opinions[3.B]
express ideas about personal artworks[4.A]
use prior knowledge and experiences to understand meanings in English.[ELP.1A]
speak using learning strategies such as requesting assistance, employing non-verbal cues, and using synonyms and circumlocution (conveying ideas by defining or describing when exact English words are not known).[ELP.1D]
use visual, contextual, and linguistic support to enhance and confirm understanding of increasingly complex and elaborated spoken language.[ELP.2E]
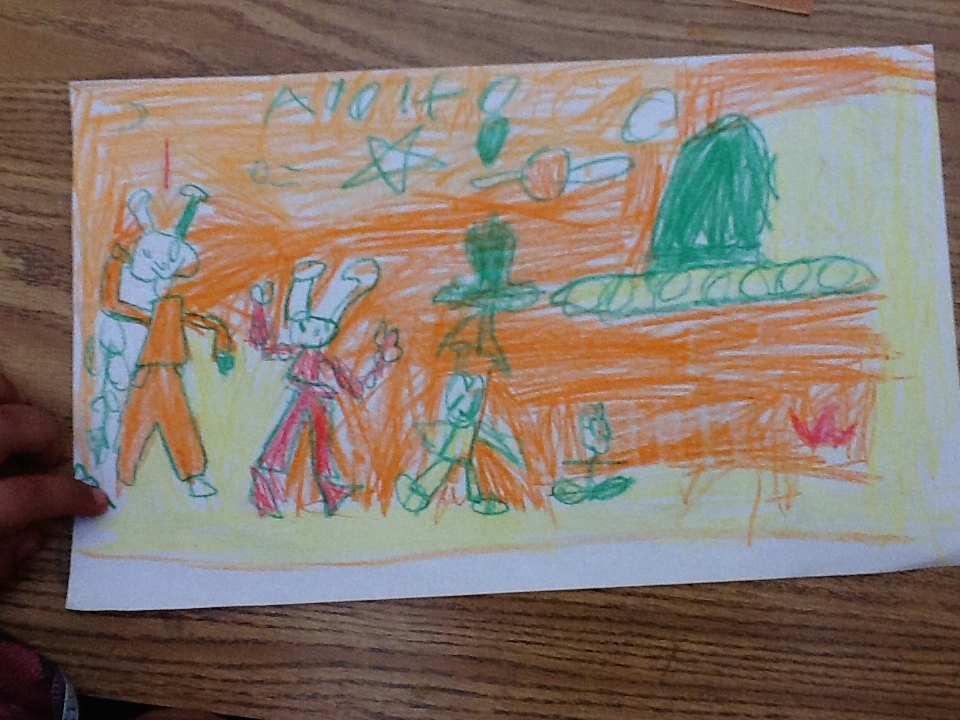
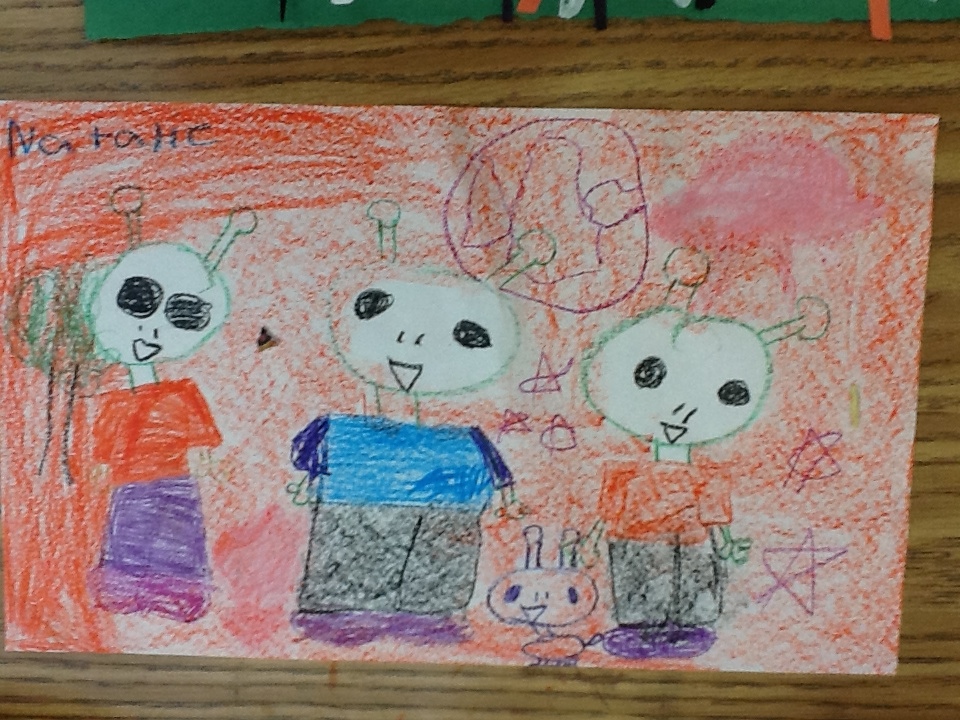
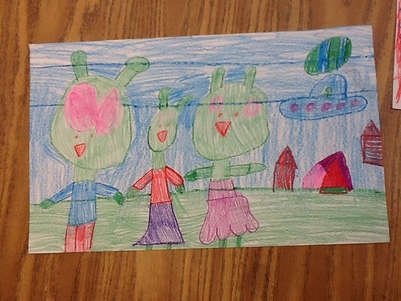
Title of Project: Alien Family
Lesson Content Objective(s):
Lesson Language Objective(s):
Instructional Plan:
Engage: Artists who specialize in this style of fantasy art combine art and science in exciting hybrid that requires the skill and precise work of traditional fine art. Planetary maps and knowledge of the planets, stars, and endless wonders of the universe are as necessary as a palette and brush to these artist. Good “space art” makes the viewer want to go there. NASA employs this art form to further the space program.
Explore: In this project, art and science combine to portray scenes of places you have never been and will never see. Techniques, using nontoxic materials, have been adapted for the classroom to create galaxies, comets, exploding stars, domed cities, space rocks, crevices, and planets.
Students learn about computer graphic illustrators and how that is a job in art.
Explain:
Evaluate: Students show their alien family and tell about their galaxy.
glean information from the environment, using the five senses[1.A]
identify colors, textures, forms, and subjects in the environment[1.B]
create artworks, using a variety of colors, forms, and lines[2.A]
arrange forms intuitively to create artworks[2.B]
identify simple subjects expressed in artworks[3.A]
share ideas about personal artworks and the work of others, demonstrating respect for differing opinions[3.B]
express ideas about personal artworks[4.A]
use prior knowledge and experiences to understand meanings in English.[ELP.1A]
speak using learning strategies such as requesting assistance, employing non-verbal cues, and using synonyms and circumlocution (conveying ideas by defining or describing when exact English words are not known).[ELP.1D]
use visual, contextual, and linguistic support to enhance and confirm understanding of increasingly complex and elaborated spoken language.[ELP.2E]
Title of Project: Alien Family
Lesson Content Objective(s):
- Students learn about fantasy space art.
- Students will learn about astronomy and how it can be used as art.
Lesson Language Objective(s):
- Students review patterns and repetition creating patterns and repetition on their aliens and space ship.
Instructional Plan:
Engage: Artists who specialize in this style of fantasy art combine art and science in exciting hybrid that requires the skill and precise work of traditional fine art. Planetary maps and knowledge of the planets, stars, and endless wonders of the universe are as necessary as a palette and brush to these artist. Good “space art” makes the viewer want to go there. NASA employs this art form to further the space program.
Explore: In this project, art and science combine to portray scenes of places you have never been and will never see. Techniques, using nontoxic materials, have been adapted for the classroom to create galaxies, comets, exploding stars, domed cities, space rocks, crevices, and planets.
Students learn about computer graphic illustrators and how that is a job in art.
Explain:
- Students create an alien family.
- Students create alien planet with alien architecture.
- Students create another galaxy in the sky that shows comets, exploding stars, domed cities, space rocks, crevices, and planets.
Evaluate: Students show their alien family and tell about their galaxy.
Art, Kindergarten
glean information from the environment, using the five senses[1.A]
identify colors, textures, forms, and subjects in the environment[1.B]
create artworks, using a variety of colors, forms, and lines[2.A]
develop manipulative skills when drawing, painting, printmaking, and constructing artworks, using a variety of materials[2.C]
share ideas about personal artworks and the work of others, demonstrating respect for differing opinions[3.B]
relate art to everyday life[3.C]
express ideas about original artworks, portfolios, and exhibitions by peers and artists[4.B]
use prior knowledge and experiences to understand meanings in English.[ELP.1A]
speak using learning strategies such as requesting assistance, employing non-verbal cues, and using synonyms and circumlocution (conveying ideas by defining or describing when exact English words are not known).[ELP.1D]
use visual, contextual, and linguistic support to enhance and confirm understanding of increasingly complex and elaborated spoken language.[ELP.2E]
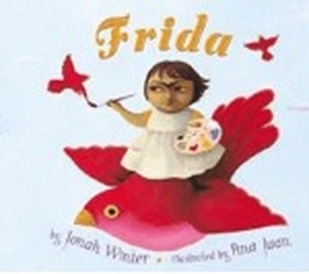
Title of Project: Frida Kohlos Self Portrait
Lesson Content Objective(s):
Instructional Plan:
Engage: Read Frida by Jonah Winter.
Explore: This book chronicles the life of artist Magdalena Carmen Frida Kahlo, discussing how she learned to paint, how painting saved her life, and why her paintings are so unique. Discuss self-portraits and the artist Frida Kahlo.
Explain: Discuss how to draw a self-portrait
Eleborate:
Evaluate: Students explain how they created balance and contrast in their picture. Students discuss the things in their picture that they have placed to tell a story about them.
glean information from the environment, using the five senses[1.A]
identify colors, textures, forms, and subjects in the environment[1.B]
create artworks, using a variety of colors, forms, and lines[2.A]
develop manipulative skills when drawing, painting, printmaking, and constructing artworks, using a variety of materials[2.C]
share ideas about personal artworks and the work of others, demonstrating respect for differing opinions[3.B]
relate art to everyday life[3.C]
express ideas about original artworks, portfolios, and exhibitions by peers and artists[4.B]
use prior knowledge and experiences to understand meanings in English.[ELP.1A]
speak using learning strategies such as requesting assistance, employing non-verbal cues, and using synonyms and circumlocution (conveying ideas by defining or describing when exact English words are not known).[ELP.1D]
use visual, contextual, and linguistic support to enhance and confirm understanding of increasingly complex and elaborated spoken language.[ELP.2E]
Title of Project: Frida Kohlos Self Portrait
Lesson Content Objective(s):
- Students construct a composition that tells a story about them.
- Compare how Family portrait are different from self portraits.
- Students learn about the Mexican artist Frida Kahlo.
- Students learn about facial proportions.
- Students are able to create a composition using balance and contrast.
Instructional Plan:
Engage: Read Frida by Jonah Winter.
Explore: This book chronicles the life of artist Magdalena Carmen Frida Kahlo, discussing how she learned to paint, how painting saved her life, and why her paintings are so unique. Discuss self-portraits and the artist Frida Kahlo.
Explain: Discuss how to draw a self-portrait
Eleborate:
- Students draw a portrait of themselves.
- Then color the background so that it shows balance and contrast with objects that represent them in a border around their picture.
Evaluate: Students explain how they created balance and contrast in their picture. Students discuss the things in their picture that they have placed to tell a story about them.

Art, Kindergarten
identify colors, textures, forms, and subjects in the environment[1.B]
create artworks, using a variety of colors, forms, and lines[2.A]
develop manipulative skills when drawing, painting, printmaking, and constructing artworks, using a variety of materials[2.C]
share ideas about personal artworks and the work of others, demonstrating respect for differing opinions[3.B]
relate art to everyday life[3.C]
express ideas about original artworks, portfolios, and exhibitions by peers and artists[4.B]
use prior knowledge and experiences to understand meanings in English.[ELP.1A]
speak using learning strategies such as requesting assistance, employing non-verbal cues, and using synonyms and circumlocution (conveying ideas by defining or describing when exact English words are not known).[ELP.1D]
use visual, contextual, and linguistic support to enhance and confirm understanding of increasingly complex and elaborated spoken language.[ELP.2E]
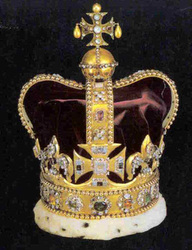
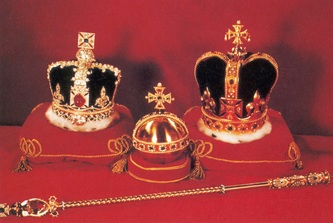
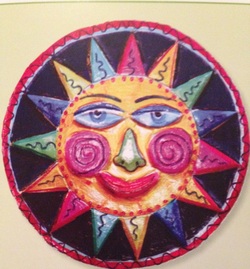
Title of Project: Patterns Crowns
Lesson Content Objective(s):
Instructional Plan:
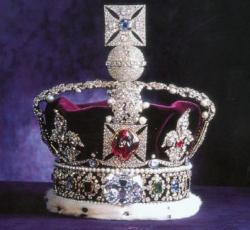
Engage: Review shapes and colors. Discuss the British Crown Jewels.
Explore: Show the different shapes and colors that are on them.
Explain: Discuss patterns and how to make them.
Eleborate:
· Students add patterns, rhythm, and overlapping designs onto a paper strip.
· Students add texture with buttons, glitter, and beads to their paper stip.
· The crown is then stapled into a cylinder to form a crown.
Assessment:
Evaluate: Students wear their crowns and discuss the patterns, rhythm, and overlapping shapes they placed on their crown.
identify colors, textures, forms, and subjects in the environment[1.B]
create artworks, using a variety of colors, forms, and lines[2.A]
develop manipulative skills when drawing, painting, printmaking, and constructing artworks, using a variety of materials[2.C]
share ideas about personal artworks and the work of others, demonstrating respect for differing opinions[3.B]
relate art to everyday life[3.C]
express ideas about original artworks, portfolios, and exhibitions by peers and artists[4.B]
use prior knowledge and experiences to understand meanings in English.[ELP.1A]
speak using learning strategies such as requesting assistance, employing non-verbal cues, and using synonyms and circumlocution (conveying ideas by defining or describing when exact English words are not known).[ELP.1D]
use visual, contextual, and linguistic support to enhance and confirm understanding of increasingly complex and elaborated spoken language.[ELP.2E]
Title of Project: Patterns Crowns
Lesson Content Objective(s):
- Students review texture.
- Students will learn about outline and emphasis.
- Students learn about art that they can wear.
- Students learn about shapes by drawing them repeating on a long paper strip.
- Students learn about patterns by repeating shapes on a paper strip.
- Students learn about overlapping by placing textures on top of thing and repetition repeating different textures.
Instructional Plan:
Engage: Review shapes and colors. Discuss the British Crown Jewels.
Explore: Show the different shapes and colors that are on them.
Explain: Discuss patterns and how to make them.
Eleborate:
· Students add patterns, rhythm, and overlapping designs onto a paper strip.
· Students add texture with buttons, glitter, and beads to their paper stip.
· The crown is then stapled into a cylinder to form a crown.
Assessment:
Evaluate: Students wear their crowns and discuss the patterns, rhythm, and overlapping shapes they placed on their crown.
Art, Kindergarten
identify colors, textures, forms, and subjects in the environment[1.B]
create artworks, using a variety of colors, forms, and lines[2.A]
arrange forms intuitively to create artworks[2.B]
develop manipulative skills when drawing, painting, printmaking, and constructing artworks, using a variety of materials[2.C]
share ideas about personal artworks and the work of others, demonstrating respect for differing opinions[3.B]
express ideas about personal artworks[4.A]
relate art to everyday life[3.C]
use prior knowledge and experiences to understand meanings in English.[ELP.1A]
speak using learning strategies such as requesting assistance, employing non-verbal cues, and using synonyms and circumlocution (conveying ideas by defining or describing when exact English words are not known).[ELP.1D]
use visual, contextual, and linguistic support to enhance and confirm understanding of increasingly complex and elaborated spoken language.[ELP.2E]
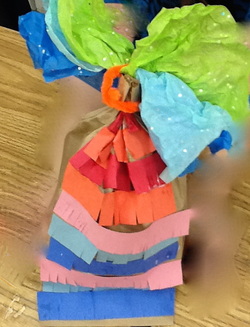
Title of Project: Piñatas and Tissue Paper Patterns
Lesson Content Objective(s):
Instructional Plan:
Engage: Review patterns and texture.
Explore: Discuss Mexican art and how it contains lots of patterns and textures in their artwork.
Explain: Discuss how Mexican art is meant to bring together the family and promotes motion.
Eleborate: · Students make a piñata out of a brown paper bag by gluing construction paper onto the bag into a pattern. (Students add fringe as a texture to their construction paper to add to their piñata.)
· Students fold multicolored layers of tissue paper together like a fan. Pull through plastic pollen stand. Then tie their tissue paper in the middle with a pipe cleaner. Then student manipulate the tissue paper into a flower.
Assessment:
Evaluate:
Students discuss the textures and patterns they made in their Mexican art.
identify colors, textures, forms, and subjects in the environment[1.B]
create artworks, using a variety of colors, forms, and lines[2.A]
arrange forms intuitively to create artworks[2.B]
develop manipulative skills when drawing, painting, printmaking, and constructing artworks, using a variety of materials[2.C]
share ideas about personal artworks and the work of others, demonstrating respect for differing opinions[3.B]
express ideas about personal artworks[4.A]
relate art to everyday life[3.C]
use prior knowledge and experiences to understand meanings in English.[ELP.1A]
speak using learning strategies such as requesting assistance, employing non-verbal cues, and using synonyms and circumlocution (conveying ideas by defining or describing when exact English words are not known).[ELP.1D]
use visual, contextual, and linguistic support to enhance and confirm understanding of increasingly complex and elaborated spoken language.[ELP.2E]
Title of Project: Piñatas and Tissue Paper Patterns
Lesson Content Objective(s):
- Students will identify the simple subjects expressed in Mexican Art.
- Students learn about origami and learn hold to fold Mexican flowers.
- Students learn about patterns by glueing paper strips on to a bag repeating a pattern.
- Students learn about piñatas and how it’s a celebration art form.
- Students review texture by cutting fringe onto paper strips.
Instructional Plan:
Engage: Review patterns and texture.
Explore: Discuss Mexican art and how it contains lots of patterns and textures in their artwork.
Explain: Discuss how Mexican art is meant to bring together the family and promotes motion.
Eleborate: · Students make a piñata out of a brown paper bag by gluing construction paper onto the bag into a pattern. (Students add fringe as a texture to their construction paper to add to their piñata.)
· Students fold multicolored layers of tissue paper together like a fan. Pull through plastic pollen stand. Then tie their tissue paper in the middle with a pipe cleaner. Then student manipulate the tissue paper into a flower.
Assessment:
Evaluate:
Students discuss the textures and patterns they made in their Mexican art.
Title of Project: Paper Bag Puppets
Lesson Content Objective(s):
Students will learn the names of shapes by drawing and cutting circles, triangles, ovals, and rectangles out.
Students will learn about what a puppet is by creating a paper bag animal.
Resources/materials: glue, crayons, paper bag, scissors
Instructional Plan:
Engage: Read Baby Bear, Baby Bear What do you See?
Explore: Have students guess the different movements the animals are making.
Explain: Discuss the five senses on the paper bag animal. For example explain we have to make round eyes for the animal to see.
Eleborate:
Evaluate:
Students show their puppets in a puppet show with another student and tell about the five senses.
Lesson Content Objective(s):
- Students will be able to identify the five senses by making an animal puppet.
- Students are able to create movement in their puppets.
- Students will be able to identify movement in a storybook.
- Students will identify their basic shapes in the animal.
Students will learn the names of shapes by drawing and cutting circles, triangles, ovals, and rectangles out.
Students will learn about what a puppet is by creating a paper bag animal.
Resources/materials: glue, crayons, paper bag, scissors
Instructional Plan:
Engage: Read Baby Bear, Baby Bear What do you See?
Explore: Have students guess the different movements the animals are making.
Explain: Discuss the five senses on the paper bag animal. For example explain we have to make round eyes for the animal to see.
Eleborate:
- On a paper plate students create the face of their animal adding eyes, nose, ears, and mouth, coloring in their plate.
- Students glue the head to their paper bag.
- Students add arms, legs, and tail to their animal by gluing it to their paper bag.
- Students finish by coloring it in.
Evaluate:
Students show their puppets in a puppet show with another student and tell about the five senses.
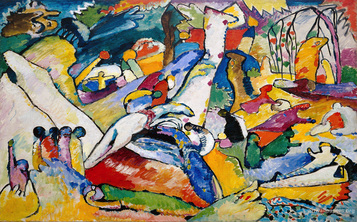
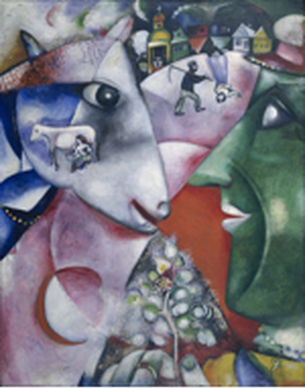 Marc Chagall, “I and the Village”
Art, Kindergarten
identify colors, textures, forms, and subjects in the environment[1.B]
create artworks, using a variety of colors, forms, and lines[2.A]
develop manipulative skills when drawing, painting, printmaking, and constructing artworks, using a variety of materials[2.C]
identify simple subjects expressed in artworks[3.A]
share ideas about personal artworks and the work of others, demonstrating respect for differing opinions[3.B]
express ideas about original artworks, portfolios, and exhibitions by peers and artists[4.B]
use prior knowledge and experiences to understand meanings in English.[ELP.1A]
speak using learning strategies such as requesting assistance, employing non-verbal cues, and using synonyms and circumlocution (conveying ideas by defining or describing when exact English words are not known).[ELP.1D]
use visual, contextual, and linguistic support to enhance and confirm understanding of increasingly complex and elaborated spoken language.[ELP.2E]
Title of Project: Marc Chagall, “I and the Village”
Lesson Content Objective(s):
Instructional Plan:
Engage: Students express an opinion about a Marc Chagall’s, “I and the Village”- like or don’t like.
Explore: Discuss what abstract art is and why it doesn’t look exactly like an object. Describe how it is like a dream like state.
Explain: Describe how Chagall put parts of his own family and neighborhood into his painting.
Eleborate: · Students draw a picture about themselves and their family and neighborhood into their own abstract dreamlike picture.
· Students draw picture with crayon and color in with watercolor.
· Students add texture with salt and flicking their paintbrush.
· Students add actual textures by outlining their picture with colored sand.
Assessment:
Evaluate: Students show their picture and students then peer evaluate their pictures by answering what is their favorite thing in their picture. What could they have added to make it even better?
identify colors, textures, forms, and subjects in the environment[1.B]
create artworks, using a variety of colors, forms, and lines[2.A]
develop manipulative skills when drawing, painting, printmaking, and constructing artworks, using a variety of materials[2.C]
identify simple subjects expressed in artworks[3.A]
share ideas about personal artworks and the work of others, demonstrating respect for differing opinions[3.B]
express ideas about original artworks, portfolios, and exhibitions by peers and artists[4.B]
use prior knowledge and experiences to understand meanings in English.[ELP.1A]
speak using learning strategies such as requesting assistance, employing non-verbal cues, and using synonyms and circumlocution (conveying ideas by defining or describing when exact English words are not known).[ELP.1D]
use visual, contextual, and linguistic support to enhance and confirm understanding of increasingly complex and elaborated spoken language.[ELP.2E]
Title of Project: Marc Chagall, “I and the Village”
Lesson Content Objective(s):
- Students review basic shapes.
- Draw a simple body with arms, legs, head and torso with some form (not stick)
- Draw a face that includes eyes, ears, nose, mouth, neck and hair
- Draw a composition that fills the page
- Demonstrate how to add texture to an artwork with watercolor.
- Fill an outline with color to create a shape
- Describe what they see in a work of art
- Express an opinion about a work of art- like or don’t like
- Describe what they see in a work of art
- Describe what an artist is
- Students learn about landscapes by creating a picture of their neighborhood.
- Students will learn about by painting shapes with watercolors. Visual textures, and actual textures adding colored sand.
Instructional Plan:
Engage: Students express an opinion about a Marc Chagall’s, “I and the Village”- like or don’t like.
Explore: Discuss what abstract art is and why it doesn’t look exactly like an object. Describe how it is like a dream like state.
Explain: Describe how Chagall put parts of his own family and neighborhood into his painting.
Eleborate: · Students draw a picture about themselves and their family and neighborhood into their own abstract dreamlike picture.
· Students draw picture with crayon and color in with watercolor.
· Students add texture with salt and flicking their paintbrush.
· Students add actual textures by outlining their picture with colored sand.
Assessment:
Evaluate: Students show their picture and students then peer evaluate their pictures by answering what is their favorite thing in their picture. What could they have added to make it even better?
Art, Kindergarten
glean information from the environment, using the five senses[1.A]
create artworks, using a variety of colors, forms, and lines[2.A]
arrange forms intuitively to create artworks[2.B]
develop manipulative skills when drawing, painting, printmaking, and constructing artworks, using a variety of materials[2.C]
share ideas about personal artworks and the work of others, demonstrating respect for differing opinions[3.B]
express ideas about original artworks, portfolios, and exhibitions by peers and artists[4.B]
use prior knowledge and experiences to understand meanings in English.[ELP.1A]
speak using learning strategies such as requesting assistance, employing non-verbal cues, and using synonyms and circumlocution (conveying ideas by defining or describing when exact English words are not known).[ELP.1D]
use visual, contextual, and linguistic support to enhance and confirm understanding of increasingly complex and elaborated spoken language.[ELP.2E]
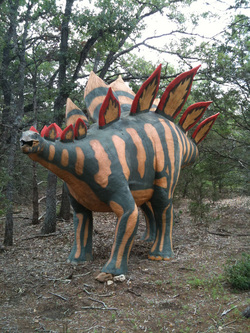
Title of Project: Dinosaurs picture
Lesson Content Objective(s):
Instructional Plan:
Engage: Read Dinosaurs Dancing and point out the dinosaur’s form and texture and color.
Explore: Discuss the shapes and forms how to make some dinosaurs in their landscape.
Explain: Students think of their favorite dinosaur the saw in the book they draw the dinosaur having motion repeating the dinosaur several times in the picture as if it is dancing in the landscape.
Eleborate: Students create rhythm in their picture through the repetition of the dinosaur moving through its environment. Student add texture to their lines with color sand.
Assessment:
Evaluate: Students show their dinosaurs discussing the dinosaur they choose and the patterns and texture they drew on the dinosaur.
glean information from the environment, using the five senses[1.A]
create artworks, using a variety of colors, forms, and lines[2.A]
arrange forms intuitively to create artworks[2.B]
develop manipulative skills when drawing, painting, printmaking, and constructing artworks, using a variety of materials[2.C]
share ideas about personal artworks and the work of others, demonstrating respect for differing opinions[3.B]
express ideas about original artworks, portfolios, and exhibitions by peers and artists[4.B]
use prior knowledge and experiences to understand meanings in English.[ELP.1A]
speak using learning strategies such as requesting assistance, employing non-verbal cues, and using synonyms and circumlocution (conveying ideas by defining or describing when exact English words are not known).[ELP.1D]
use visual, contextual, and linguistic support to enhance and confirm understanding of increasingly complex and elaborated spoken language.[ELP.2E]
Title of Project: Dinosaurs picture
Lesson Content Objective(s):
- Students will be able to create lines and shapes to form a dinosaur.
- Students will be able to identify dinosaurs as an extinct animal from the past.
- Students will be able to arrange lines intuitively to create a dinosaur.
- Students will be able to create rhythm by repeating the same shape on their dinosaur.
- Students will learn about textures by adding colored sand to their dinosaur.
- Students will create a horizon line by drawing a horizontal green line 2 inches from the bottom of their paper.
Instructional Plan:
Engage: Read Dinosaurs Dancing and point out the dinosaur’s form and texture and color.
Explore: Discuss the shapes and forms how to make some dinosaurs in their landscape.
Explain: Students think of their favorite dinosaur the saw in the book they draw the dinosaur having motion repeating the dinosaur several times in the picture as if it is dancing in the landscape.
Eleborate: Students create rhythm in their picture through the repetition of the dinosaur moving through its environment. Student add texture to their lines with color sand.
Assessment:
Evaluate: Students show their dinosaurs discussing the dinosaur they choose and the patterns and texture they drew on the dinosaur.

Teks: Art Grade K:
Perception: K.1A Glean information from the environment, using the five senses. K.1B Identify colors, textures, forms and subjects in the environment.
Creative Expression/Performance: K.2A Create artworks, using a variety of colors, forms, and lines. K.2B Arrange forms intuitively to create artworks. K.2C Develop manipulative skills when drawing, painting, printmaking, and constructing artworks using a variety of materials.
Historical/Cultural Heritage: K.3A Identify simple subjects expressed in artworks. K.3C Relate art to everyday life.
Response/Evaluation: K.4B Express ideas about original artworks, portfolios, and exhibitions by peers and artists.
Materials: multi-colored construction paper, glue, scissors, fabric, paint, crayons
Content objective:
Students will create a cityscape by overlapping shapes to form more then one building.
Activities:
Introduction:
Engage: Review patterns and texture. Explore: Talk about cityscapes, what they are how to create the shapes, and different sizes small, medium, and large.
Project:
Perception: K.1A Glean information from the environment, using the five senses. K.1B Identify colors, textures, forms and subjects in the environment.
Creative Expression/Performance: K.2A Create artworks, using a variety of colors, forms, and lines. K.2B Arrange forms intuitively to create artworks. K.2C Develop manipulative skills when drawing, painting, printmaking, and constructing artworks using a variety of materials.
Historical/Cultural Heritage: K.3A Identify simple subjects expressed in artworks. K.3C Relate art to everyday life.
Response/Evaluation: K.4B Express ideas about original artworks, portfolios, and exhibitions by peers and artists.
Materials: multi-colored construction paper, glue, scissors, fabric, paint, crayons
Content objective:
- Students will learn about; patterns, textures, shapes, to create a cityscape.
- Students learn about balance and proportions.
- Students learn how to cut out fabric.
- Students learn about what is in a city.
- Students learn about collage.
- Students review scissors and glue rules.
- Students will learn to create patterns by repeating shapes, lines, and colors.
- Students will learn about texture by adding things that a soft, hard, smooth, ruff, and shinny.
- Students will learn about a cityscape by creating rectangles and squares into buildings.
Students will create a cityscape by overlapping shapes to form more then one building.
Activities:
Introduction:
Engage: Review patterns and texture. Explore: Talk about cityscapes, what they are how to create the shapes, and different sizes small, medium, and large.
Project:
- Explain: Students fold their 9 X 12 paper into four sections; students create four different patterns on their paper.
- On an 18 X 24 black paper students create a night sky sun set.
- First by sprinkling in white stars then adding orange, yellow, and reds for a sun set.
- Students leave some black for a road.
- Students create buildings and houses by cutting out squares and rectangles of different sizes on the paper they created their patterns on.
- Students make small, medium, and large buildings, windows, and doors.
- Students add different textures with fabric and aluminum foil.
- Eleborate: Students add things that remind them of the city like, cars, signs, and people

Art, Kindergarten
glean information from the environment, using the five senses[1.A]
identify colors, textures, forms, and subjects in the environment[1.B]
create artworks, using a variety of colors, forms, and lines[2.A]
arrange forms intuitively to create artworks[2.B]
develop manipulative skills when drawing, painting, printmaking, and constructing artworks, using a variety of materials[2.C]
identify simple subjects expressed in artworks[3.A]
relate art to everyday life[3.C]
express ideas about personal artworks[4.A]
use prior knowledge and experiences to understand meanings in English.[ELP.1A]
speak using learning strategies such as requesting assistance, employing non-verbal cues, and using synonyms and circumlocution (conveying ideas by defining or describing when exact English words are not known).[ELP.1D]
use visual, contextual, and linguistic support to enhance and confirm understanding of increasingly complex and elaborated spoken language.[ELP.2E]
Title of Project: African Animal folks Stories
Lesson Content Objective(s):
Students will learn about creating patterns by repeating lines shapes and colors in their picture.
Resources/materials:paper, crayons, texture rubbing plate, white paint and q-tips ,How the Zebra Got its Spots.
Instructional Plan:
Engage: This lesson combines learning about another culture (Kenya) through story and art with learning about animal body structure in a colorful, self-expressive composition
Explore:1. Read the story, adapted from African folk tales, How the Zebra Got Its Stripes. Look at pictures of zebras, talk about the shapes that make up the body. Find Kenya on a world map and talk about where zebras live and what they eat.
Explain: 2. Students draw an African animal that they saw in the How the Zebra Got it Stripes book.
Eleborate:
3. Talk about making a border around their picture. Talk again about the zebra’s stripes. Then students then draw stripes with zigzag lines around the zebra picture. Dot patterns made with swabs and white paint complete the design.
Assessment:
Evaluate: Students discuss their zebra and what motions and backgrounds they have made. And discuss the different borders and patterns they have made.
glean information from the environment, using the five senses[1.A]
identify colors, textures, forms, and subjects in the environment[1.B]
create artworks, using a variety of colors, forms, and lines[2.A]
arrange forms intuitively to create artworks[2.B]
develop manipulative skills when drawing, painting, printmaking, and constructing artworks, using a variety of materials[2.C]
identify simple subjects expressed in artworks[3.A]
relate art to everyday life[3.C]
express ideas about personal artworks[4.A]
use prior knowledge and experiences to understand meanings in English.[ELP.1A]
speak using learning strategies such as requesting assistance, employing non-verbal cues, and using synonyms and circumlocution (conveying ideas by defining or describing when exact English words are not known).[ELP.1D]
use visual, contextual, and linguistic support to enhance and confirm understanding of increasingly complex and elaborated spoken language.[ELP.2E]
Title of Project: African Animal folks Stories
Lesson Content Objective(s):
- Students review square, rectangle, triangle, and circle shapes and learn colors.
- Students learn about the five senses and how it relates to animals.
- Review textures and what they are and how they are in our environment.
- Students will learn how to draw objects in motion.
- Students will become aware of the body structure and life of an animal (zebra) and demonstrate that awareness by drawing it.
- Students will learn to use stripes and dots as design elements.
- Students will be introduced to aspects of another culture’s stories and art forms.
Students will learn about creating patterns by repeating lines shapes and colors in their picture.
Resources/materials:paper, crayons, texture rubbing plate, white paint and q-tips ,How the Zebra Got its Spots.
Instructional Plan:
Engage: This lesson combines learning about another culture (Kenya) through story and art with learning about animal body structure in a colorful, self-expressive composition
Explore:1. Read the story, adapted from African folk tales, How the Zebra Got Its Stripes. Look at pictures of zebras, talk about the shapes that make up the body. Find Kenya on a world map and talk about where zebras live and what they eat.
Explain: 2. Students draw an African animal that they saw in the How the Zebra Got it Stripes book.
Eleborate:
3. Talk about making a border around their picture. Talk again about the zebra’s stripes. Then students then draw stripes with zigzag lines around the zebra picture. Dot patterns made with swabs and white paint complete the design.
Assessment:
Evaluate: Students discuss their zebra and what motions and backgrounds they have made. And discuss the different borders and patterns they have made.

Teks: Art Grade K:
Perception: K.1A Glean information from the environment, using the five senses. K.1B Identify colors, textures, forms and subjects in the environment.
Creative Expression/Performance: K.2A Create artworks, using a variety of colors, forms, and lines. K.2B Arrange forms intuitively to create artworks. K.2C Develop manipulative skills when drawing, painting, printmaking, and constructing artworks using a variety of materials. Historical/Cultural Heritage: K.3C Relate art to everyday life.
Response/Evaluation: K.4A Express ideas about personal artwork.
Title of Project: Mouse Paint (Start creating the clay Mouse)
Lesson Content Objective(s):
Instructional Plan:
Engage: Read Mouse Paint and explain primary and secondary colors and how to create them with paint
Explore:
Assessment:
Evaluate: Students show their mouse and tell about the colors that they used.
Perception: K.1A Glean information from the environment, using the five senses. K.1B Identify colors, textures, forms and subjects in the environment.
Creative Expression/Performance: K.2A Create artworks, using a variety of colors, forms, and lines. K.2B Arrange forms intuitively to create artworks. K.2C Develop manipulative skills when drawing, painting, printmaking, and constructing artworks using a variety of materials. Historical/Cultural Heritage: K.3C Relate art to everyday life.
Response/Evaluation: K.4A Express ideas about personal artwork.
Title of Project: Mouse Paint (Start creating the clay Mouse)
Lesson Content Objective(s):
- Students Learn about sculpture and how to create 3-D forms.
- Students learn sculpture term knead, press, and pull.
- Students learn to create a creature with eyes, nose, mouth, ears.
- Students review square, rectangle, triangle, and circle shapes.
- Students learn about colors.
- Students learn about primary colors.
- Students learn how to mix secondary colors.
Instructional Plan:
Engage: Read Mouse Paint and explain primary and secondary colors and how to create them with paint
Explore:
- Students roll a small ball to create the body of the mouse, student then push their thumb in to create a pinch pot.
- Student pinch a nose on the body, then add eyes, and ears on the mouse.
- Last students add legs and tail to their mouse.
- Students the next week paint their clay once it has been fired.
- Students draw and paint a mouse on a flat paper so they can compare 2-D & 3-D.
Assessment:
Evaluate: Students show their mouse and tell about the colors that they used.
 Lesson idea From:
Denise Logan's Amazing Art Projects For Children
Lesson idea From:
Denise Logan's Amazing Art Projects For Children
Art, Kindergarten
glean information from the environment, using the five senses[1.A]
identify colors, textures, forms, and subjects in the environment[1.B]
create artworks, using a variety of colors, forms, and lines[2.A]
arrange forms intuitively to create artworks[2.B]
develop manipulative skills when drawing, painting, printmaking, and constructing artworks, using a variety of materials[2.C]
share ideas about personal artworks and the work of others, demonstrating respect for differing opinions[3.B]
relate art to everyday life[3.C]
express ideas about original artworks, portfolios, and exhibitions by peers and artists[4.B]
use prior knowledge and experiences to understand meanings in English.[ELP.1A]
speak using learning strategies such as requesting assistance, employing non-verbal cues, and using synonyms and circumlocution (conveying ideas by defining or describing when exact English words are not known).[ELP.1D]
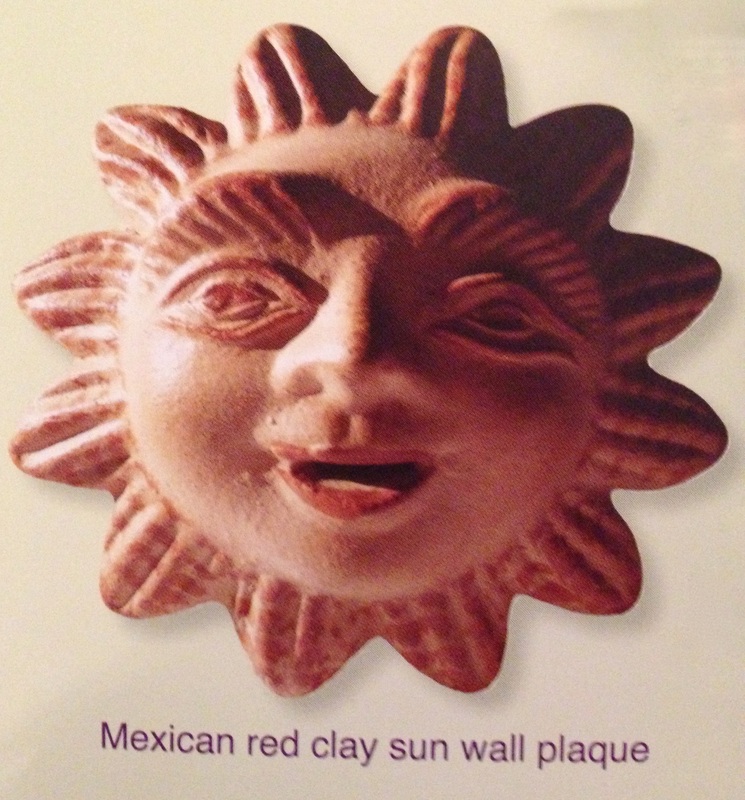
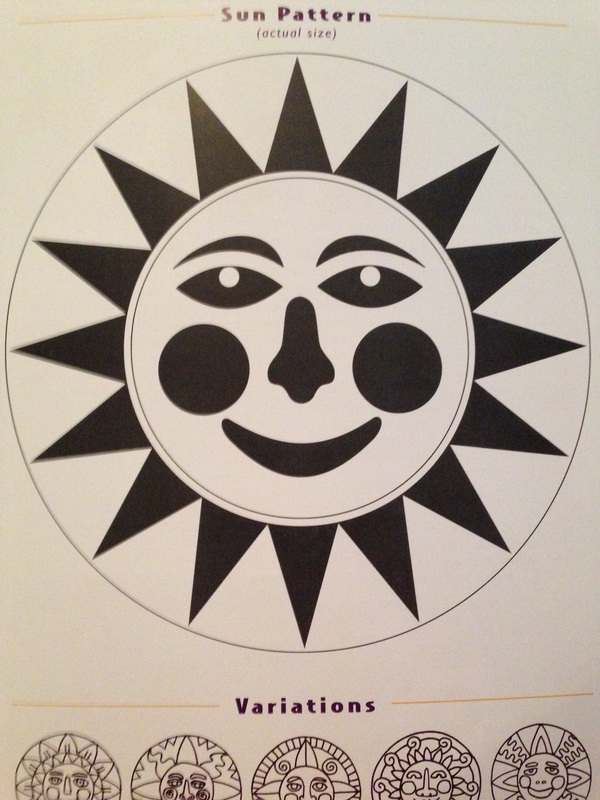
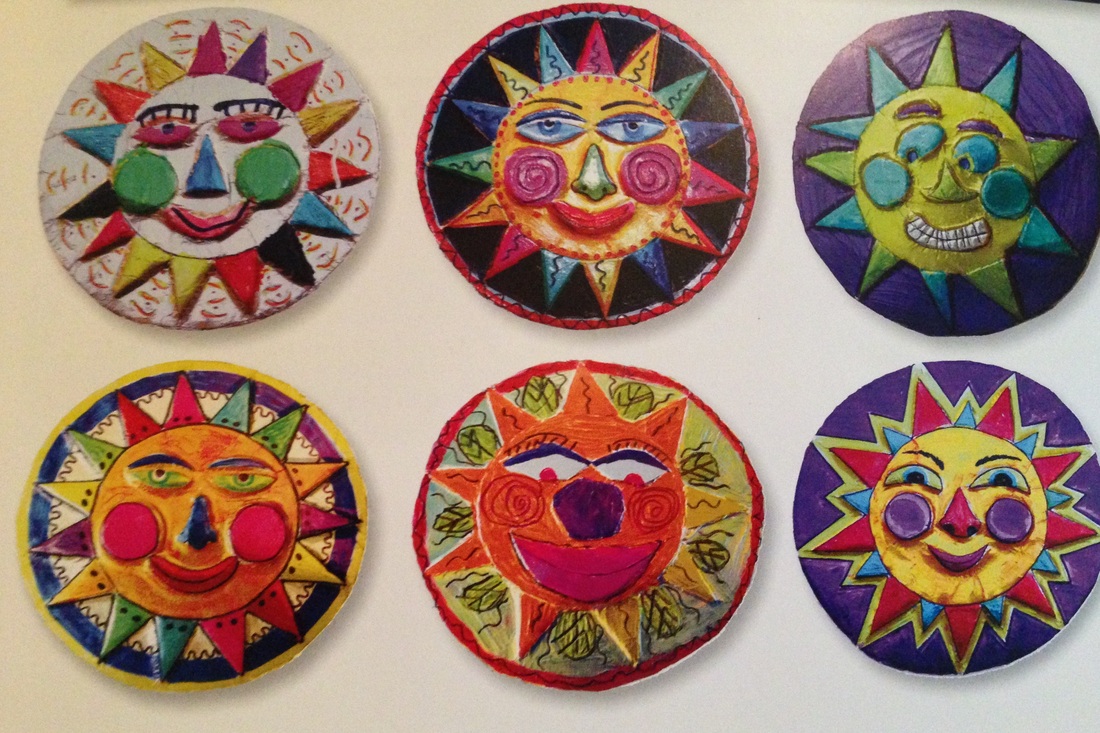
Title of Project: Metepec Suns
Lesson Content Objective(s):
Students learn about warm and cool colors.
Students learn about symmetrical balance by creating a face.
Students learn about Mexican Art.
Students learn how to cut shapes out of paper.
Lesson Language Objective(s):
Student will learn about Embossing by glueing aluminum foil over their foam shapes and pressing the forms out to create pressed shapes out of metal.
Students will create Relief Sculpture by cutting foam shapes glueing them overlapping to form a raised surface.
Resources/materials: Aluminum Foil, markers, foam, acrylic paint, scissors, glue, card stock 12 X 8 1/2
Instructional Plan:
Engage: A Metepec Sun, or sun from Metepec, Mexico, is a symbol of good luck and prosperity. Many regions of Mexico have their own unique arts and crafts. Metepec, a town located an hour southeast of Mexico City, is best known for its clay crafts and specifically for its clay suns. Metepec suns are often displayed on the outside of homes or porches as a symbol of life and renewal.
Explore: This Metepec sun project incorporates this cultural symbol into an embossed aluminum foil relief that is covered in bright colors reminiscent of the Mexican tin art created in regions nearby.
Explain:
5. Glue foil over the top of the sun.
6. Paint with bright colors.
Assessment:
Evaluate: Students show their suns talking about their colors and shapes.
glean information from the environment, using the five senses[1.A]
identify colors, textures, forms, and subjects in the environment[1.B]
create artworks, using a variety of colors, forms, and lines[2.A]
arrange forms intuitively to create artworks[2.B]
develop manipulative skills when drawing, painting, printmaking, and constructing artworks, using a variety of materials[2.C]
share ideas about personal artworks and the work of others, demonstrating respect for differing opinions[3.B]
relate art to everyday life[3.C]
express ideas about original artworks, portfolios, and exhibitions by peers and artists[4.B]
use prior knowledge and experiences to understand meanings in English.[ELP.1A]
speak using learning strategies such as requesting assistance, employing non-verbal cues, and using synonyms and circumlocution (conveying ideas by defining or describing when exact English words are not known).[ELP.1D]
Title of Project: Metepec Suns
Lesson Content Objective(s):
Students learn about warm and cool colors.
Students learn about symmetrical balance by creating a face.
Students learn about Mexican Art.
Students learn how to cut shapes out of paper.
Lesson Language Objective(s):
Student will learn about Embossing by glueing aluminum foil over their foam shapes and pressing the forms out to create pressed shapes out of metal.
Students will create Relief Sculpture by cutting foam shapes glueing them overlapping to form a raised surface.
Resources/materials: Aluminum Foil, markers, foam, acrylic paint, scissors, glue, card stock 12 X 8 1/2
Instructional Plan:
Engage: A Metepec Sun, or sun from Metepec, Mexico, is a symbol of good luck and prosperity. Many regions of Mexico have their own unique arts and crafts. Metepec, a town located an hour southeast of Mexico City, is best known for its clay crafts and specifically for its clay suns. Metepec suns are often displayed on the outside of homes or porches as a symbol of life and renewal.
Explore: This Metepec sun project incorporates this cultural symbol into an embossed aluminum foil relief that is covered in bright colors reminiscent of the Mexican tin art created in regions nearby.
Explain:
- Trace 3 circles, face & checks.
- Then create a triangle nose, oval eyes and crescent Mouth & eyebrows.
- Glue face together on 12X8 ½ Bristol board.
- Make sun rays by cutting out triangles.
5. Glue foil over the top of the sun.
6. Paint with bright colors.
Assessment:
Evaluate: Students show their suns talking about their colors and shapes.
 Kandinsky
Art, Kindergarten
identify colors, textures, forms, and subjects in the environment[1.B]
create artworks, using a variety of colors, forms, and lines[2.A]
arrange forms intuitively to create artworks[2.B]
develop manipulative skills when drawing, painting, printmaking, and constructing artworks, using a variety of materials[2.C]
share ideas about personal artworks and the work of others, demonstrating respect for differing opinions[3.B]
express ideas about original artworks, portfolios, and exhibitions by peers and artists[4.B]
Title of Project: Kandinsky’s Lines and shapes
Lesson Content Objective(s):
Resources/materials: paper, scissors, tissue paper, glue, sand
Instructional Plan:
Engage: Looking at the artwork of Kandinsky, students point out and name the different lines and shapes in the artwork.
Explore: Students name their primary and secondary colors. Students tell what primary colors make their secondary colors.
Explain: Students overlap tissue paper making shapes and secondary colors.
Eleborate:
Evaluate: Students compare and contrast their artwork with their neighbor reflecting on the lines, shapes, and textures they have made.
identify colors, textures, forms, and subjects in the environment[1.B]
create artworks, using a variety of colors, forms, and lines[2.A]
arrange forms intuitively to create artworks[2.B]
develop manipulative skills when drawing, painting, printmaking, and constructing artworks, using a variety of materials[2.C]
share ideas about personal artworks and the work of others, demonstrating respect for differing opinions[3.B]
express ideas about original artworks, portfolios, and exhibitions by peers and artists[4.B]
Title of Project: Kandinsky’s Lines and shapes
Lesson Content Objective(s):
- Students evaluate the artwork of Kandinsky. Describing the different lines and shapes in the artwork.
- Students are able to name and describe different lines and shapes.
- Students learn how to cut shapes out of paper.
- Students learn how to use glue correctly.
- Students learn about overlapping by placing shapes on top of shapes.
- Students learn about their primary and secondary colors by overlapping primary color tissue paper to create a secondary color.
Resources/materials: paper, scissors, tissue paper, glue, sand
Instructional Plan:
Engage: Looking at the artwork of Kandinsky, students point out and name the different lines and shapes in the artwork.
Explore: Students name their primary and secondary colors. Students tell what primary colors make their secondary colors.
Explain: Students overlap tissue paper making shapes and secondary colors.
Eleborate:
- Students cut out 5 circles, 5 triangles, 5 squares, 5 rectangles, and 5 free form shapes in tissue paper and glue it onto their picture. Overlapping the primary colors creating secondary colors.
- Colored sand is placed over the glue to add color and texture.
Evaluate: Students compare and contrast their artwork with their neighbor reflecting on the lines, shapes, and textures they have made.
Art, Kindergarten
identify colors, textures, forms, and subjects in the environment[1.B]
create artworks, using a variety of colors, forms, and lines[2.A]
arrange forms intuitively to create artworks[2.B]
develop manipulative skills when drawing, painting, printmaking, and constructing artworks, using a variety of materials[2.C]
identify simple subjects expressed in artworks[3.A]
relate art to everyday life[3.C]
express ideas about personal artworks[4.A]
use prior knowledge and experiences to understand meanings in English.[ELP.1A]
speak using learning strategies such as requesting assistance, employing non-verbal cues, and using synonyms and circumlocution (conveying ideas by defining or describing when exact English words are not known).[ELP.1D]
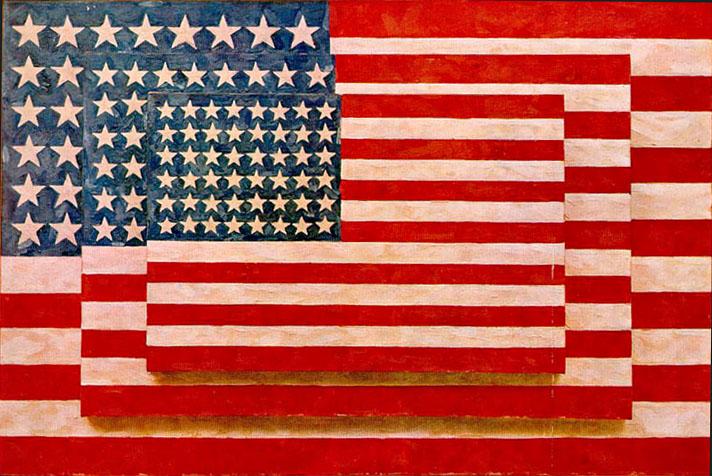
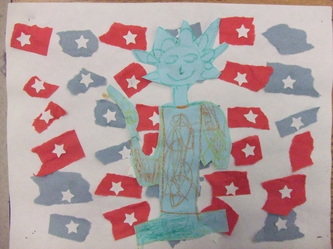
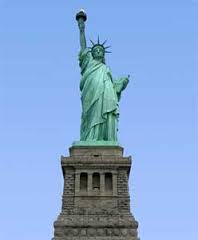
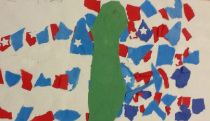
Title of Project: “Kaleidoscope” American Flag Collage
Lesson Content Objective(s):
Instructional Plan:
Engage: Talk about shapes that use strait line.
Explore: Discuss how we make them. Students tear out 10 squares, rectangle, triangle, and rhombus.
Explain: Students glue their shapes on their paper in a spiral alternating red and blue in a pattern. Students glue white stars on to their American Flag.
Eleborate: Students will draw and cut out statue of Liberty then add it into the middle of their picture
Assessment:
Evaluate: Students discuss their picture and tell why they made the pattern they choose using their torn shapes.
identify colors, textures, forms, and subjects in the environment[1.B]
create artworks, using a variety of colors, forms, and lines[2.A]
arrange forms intuitively to create artworks[2.B]
develop manipulative skills when drawing, painting, printmaking, and constructing artworks, using a variety of materials[2.C]
identify simple subjects expressed in artworks[3.A]
relate art to everyday life[3.C]
express ideas about personal artworks[4.A]
use prior knowledge and experiences to understand meanings in English.[ELP.1A]
speak using learning strategies such as requesting assistance, employing non-verbal cues, and using synonyms and circumlocution (conveying ideas by defining or describing when exact English words are not known).[ELP.1D]
Title of Project: “Kaleidoscope” American Flag Collage
Lesson Content Objective(s):
- Use glue sticks correctly.
- Tear a shape out of paper without frustration.
- Students learn to wash hands and clean tables without assistance.
- Discuss Artist Jasper Johns.
- Students learn about spiral.
- Students learn about pattern.
- Students learn about shapes: stars, square, rectangle, triangle, and rhombus.
Instructional Plan:
Engage: Talk about shapes that use strait line.
Explore: Discuss how we make them. Students tear out 10 squares, rectangle, triangle, and rhombus.
Explain: Students glue their shapes on their paper in a spiral alternating red and blue in a pattern. Students glue white stars on to their American Flag.
Eleborate: Students will draw and cut out statue of Liberty then add it into the middle of their picture
Assessment:
Evaluate: Students discuss their picture and tell why they made the pattern they choose using their torn shapes.
Art, Kindergarten
glean information from the environment, using the five senses[1.A]
identify colors, textures, forms, and subjects in the environment[1.B]
create artworks, using a variety of colors, forms, and lines[2.A]
arrange forms intuitively to create artworks[2.B]
develop manipulative skills when drawing, painting, printmaking, and constructing artworks, using a variety of materials[2.C]
identify simple subjects expressed in artworks[3.A]
relate art to everyday life[3.C]
express ideas about personal artworks[4.A]
use prior knowledge and experiences to understand meanings in English.[ELP.1A]
speak using learning strategies such as requesting assistance, employing non-verbal cues, and using synonyms and circumlocution (conveying ideas by defining or describing when exact English words are not known).[ELP.1D]
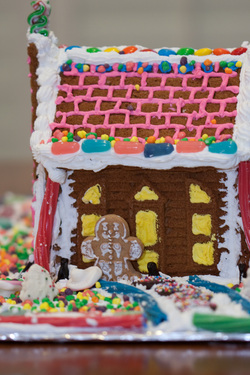
Title of Project: Family Portrait Gingerbread House
Lesson Content Objective(s):
Instructional Plan:
Engage: Discuss Mary Cassatt and her family portraits.
Explore: Explain how to use markers and glue.
Explain:Explain what textures are and how some are hard, soft, smooth, and shinny.
Eleborate: Students create a gingerbread house.
Students create a Family portrait placing them and their parents in their pictures.
Students add color sand and textures with glue.
Assessment:
Evaluate: Students show their Family-portraits.
glean information from the environment, using the five senses[1.A]
identify colors, textures, forms, and subjects in the environment[1.B]
create artworks, using a variety of colors, forms, and lines[2.A]
arrange forms intuitively to create artworks[2.B]
develop manipulative skills when drawing, painting, printmaking, and constructing artworks, using a variety of materials[2.C]
identify simple subjects expressed in artworks[3.A]
relate art to everyday life[3.C]
express ideas about personal artworks[4.A]
use prior knowledge and experiences to understand meanings in English.[ELP.1A]
speak using learning strategies such as requesting assistance, employing non-verbal cues, and using synonyms and circumlocution (conveying ideas by defining or describing when exact English words are not known).[ELP.1D]
Title of Project: Family Portrait Gingerbread House
Lesson Content Objective(s):
- Students learn how to draw characters and environments for their pictures.
- Students learn how to paint with a paint brush without splish splashing
- Draw a simple body with arms, legs, head and torso with some form (not stick).
- Draw a face that includes eyes, ears, nose, mouth, neck and hair
- Draw a composition that fills the page
- Students review square, rectangle, triangle, and circle shapes.
- Students learn about texture.
Instructional Plan:
Engage: Discuss Mary Cassatt and her family portraits.
Explore: Explain how to use markers and glue.
Explain:Explain what textures are and how some are hard, soft, smooth, and shinny.
Eleborate: Students create a gingerbread house.
Students create a Family portrait placing them and their parents in their pictures.
Students add color sand and textures with glue.
Assessment:
Evaluate: Students show their Family-portraits.
Art, Kindergarten
glean information from the environment, using the five senses[1.A]
identify colors, textures, forms, and subjects in the environment[1.B]
relate art to everyday life[3.C]
express ideas about personal artworks[4.A]
share ideas about personal artworks and the work of others, demonstrating respect for differing opinions[3.B]
use prior knowledge and experiences to understand meanings in English.[ELP.1A]
use visual, contextual, and linguistic support to enhance and confirm understanding of increasingly complex and elaborated spoken language.[ELP.2E]
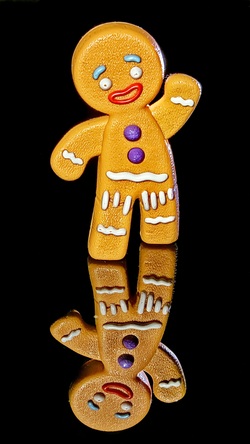
Title of Project: Gingerbread Man
Lesson Content Objective(s):
Instructional Plan:
Engage: Watch a video that reads the Gingerbread man fable.
Explore: Discuss how to make a gingerbread man.
Explain: Discuss what a background is and the different characters in the story that they could add to their background.
Eleborate:
· Students sketch their gingerbread man and background
· Students paint their gingerbread man and background.
· Student’s glue on textures like puffballs for gum drops, google eyes for eyes, sand or glitter for texture design.
· Students finish their clay texture impressions by painting them. Share with others what they painted on them expressing ideas about personal artworks and sharing opinions demonstrating respect for others.
Assessment:
Evaluate:
Students discuss the textures that are in their picture.
glean information from the environment, using the five senses[1.A]
identify colors, textures, forms, and subjects in the environment[1.B]
relate art to everyday life[3.C]
express ideas about personal artworks[4.A]
share ideas about personal artworks and the work of others, demonstrating respect for differing opinions[3.B]
use prior knowledge and experiences to understand meanings in English.[ELP.1A]
use visual, contextual, and linguistic support to enhance and confirm understanding of increasingly complex and elaborated spoken language.[ELP.2E]
Title of Project: Gingerbread Man
Lesson Content Objective(s):
- Students learn how to draw characters and background for their pictures.
- Students learn how to use glue.
- Students learn about texture.
- Students review square, rectangle, triangle, and circle shapes.
- Students learn about colors.
Instructional Plan:
Engage: Watch a video that reads the Gingerbread man fable.
Explore: Discuss how to make a gingerbread man.
Explain: Discuss what a background is and the different characters in the story that they could add to their background.
Eleborate:
· Students sketch their gingerbread man and background
· Students paint their gingerbread man and background.
· Student’s glue on textures like puffballs for gum drops, google eyes for eyes, sand or glitter for texture design.
· Students finish their clay texture impressions by painting them. Share with others what they painted on them expressing ideas about personal artworks and sharing opinions demonstrating respect for others.
Assessment:
Evaluate:
Students discuss the textures that are in their picture.
Art, Kindergarten
identify colors, textures, forms, and subjects in the environment[1.B]
create artworks, using a variety of colors, forms, and lines[2.A]
arrange forms intuitively to create artworks[2.B]
develop manipulative skills when drawing, painting, printmaking, and constructing artworks, using a variety of materials[2.C]
identify simple subjects expressed in artworks[3.A]
relate art to everyday life[3.C]
express ideas about personal artworks[4.A]
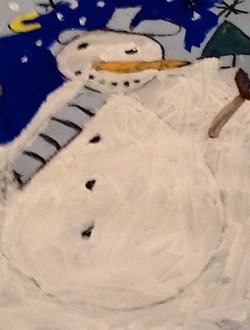
Title of Project: Snowman Portrait
Lesson Content Objective(s):
12x18 blue construction paper
pencil
black oil pastel
tempera paint in white, red, yellow and blue
Instructional Plan:
Engage:I began by showing examples of portraits (I chose several by Vincent Van Gogh) in three different formats: straight on, profile, and 3/4 view. I explained that with the 3/4 view, you see both eyes but only one ear (if the ears are showing) and you see one side of the nose.
Explore:I told them our portrait would be of a snowman, so we would see his carrot nose from the side. Then we talked about how we could make our snowman look BIG… either by putting him next to a house and making him bigger than the house, or by cropping — showing just a section of him with the rest going off the page, like he’s too big to fit on the paper!
Eleborate: 1. With your paper in the vertical position, first draw your snowman with a pencil: Draw a large semi-circle that starts and ends on the left edge of the paper. Start about 2″ down to leave room for his hat!
2. Now draw a curvy line beginning about 2/3 of the way down on your semi-circle and ending on the bottom edge of your paper, near the right side.
3. Next add all the details your snowman needs: two eyes, a carrot nose, mouth, buttons, hat and scarf. Don’t forget a stick for his arm! When drawing the carrot nose, be sure to place the carrot so that it begins between the eyes, to get the correct angle for a 3/4 view!
4. Trace all your pencil lines with a black oil pastel.
5. With white tempera, paint your snowman’s face and body, painting around the oil pastel lines. Add some snowflakes in the sky.
6. Then, paint your snowman’s nose by mixing some red and yellow to make orange. Mix more colors to paint his hat and scarf.
Assessment:
Evaluate: Students show and tell their portraits.
identify colors, textures, forms, and subjects in the environment[1.B]
create artworks, using a variety of colors, forms, and lines[2.A]
arrange forms intuitively to create artworks[2.B]
develop manipulative skills when drawing, painting, printmaking, and constructing artworks, using a variety of materials[2.C]
identify simple subjects expressed in artworks[3.A]
relate art to everyday life[3.C]
express ideas about personal artworks[4.A]
Title of Project: Snowman Portrait
Lesson Content Objective(s):
- Students review square, rectangle, triangle, and circle shapes.
- Students learn about colors.
- Students learn how to draw characters and background for their pictures.
- Students learn how to use tempera.
- Students learn about portraits and what a profile is in a portrait.
12x18 blue construction paper
pencil
black oil pastel
tempera paint in white, red, yellow and blue
Instructional Plan:
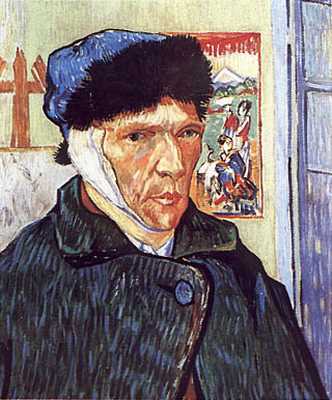
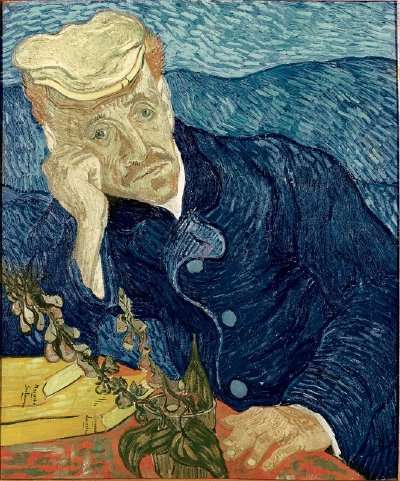
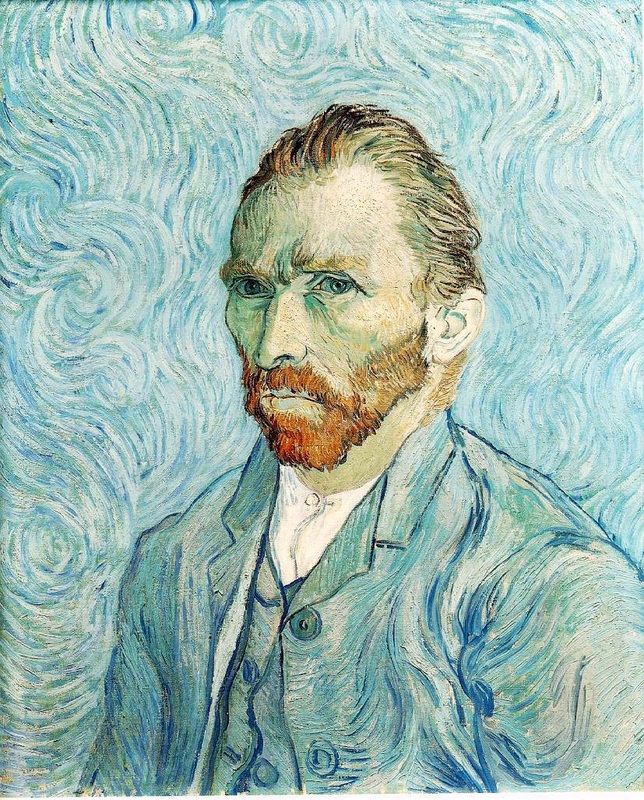
Engage:I began by showing examples of portraits (I chose several by Vincent Van Gogh) in three different formats: straight on, profile, and 3/4 view. I explained that with the 3/4 view, you see both eyes but only one ear (if the ears are showing) and you see one side of the nose.
Explore:I told them our portrait would be of a snowman, so we would see his carrot nose from the side. Then we talked about how we could make our snowman look BIG… either by putting him next to a house and making him bigger than the house, or by cropping — showing just a section of him with the rest going off the page, like he’s too big to fit on the paper!
Eleborate: 1. With your paper in the vertical position, first draw your snowman with a pencil: Draw a large semi-circle that starts and ends on the left edge of the paper. Start about 2″ down to leave room for his hat!
2. Now draw a curvy line beginning about 2/3 of the way down on your semi-circle and ending on the bottom edge of your paper, near the right side.
3. Next add all the details your snowman needs: two eyes, a carrot nose, mouth, buttons, hat and scarf. Don’t forget a stick for his arm! When drawing the carrot nose, be sure to place the carrot so that it begins between the eyes, to get the correct angle for a 3/4 view!
4. Trace all your pencil lines with a black oil pastel.
5. With white tempera, paint your snowman’s face and body, painting around the oil pastel lines. Add some snowflakes in the sky.
6. Then, paint your snowman’s nose by mixing some red and yellow to make orange. Mix more colors to paint his hat and scarf.
Assessment:
Evaluate: Students show and tell their portraits.
Art, Kindergarten
glean information from the environment, using the five senses[1.A]
identify colors, textures, forms, and subjects in the environment[1.B]
create artworks, using a variety of colors, forms, and lines[2.A]
arrange forms intuitively to create artworks[2.B]
develop manipulative skills when drawing, painting, printmaking, and constructing artworks, using a variety of materials[2.C]
identify simple subjects expressed in artworks[3.A]
relate art to everyday life[3.C]
express ideas about personal artworks[4.A]
use prior knowledge and experiences to understand meanings in English.[ELP.1A]
speak using learning strategies such as requesting assistance, employing non-verbal cues, and using synonyms and circumlocution (conveying ideas by defining or describing when exact English words are not known).[ELP.1D]
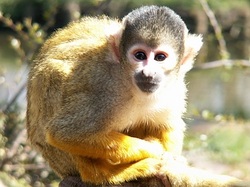
Title of Project: Shape Monkey Landscape
Lesson Content Objective(s):
Lesson Language Objective(s):
Instructional Plan:
Engage: Discuss how symmetrical balance means same on both sides.
Explore: Discuss Artist Henri Rousseau and his jungle monkey paintings.
Explain: Read Henri Rousseau book.
Eleborate:
Evaluate: Students show their monkey and discuss how they created symmetrical balance with shapes on its face.
glean information from the environment, using the five senses[1.A]
identify colors, textures, forms, and subjects in the environment[1.B]
create artworks, using a variety of colors, forms, and lines[2.A]
arrange forms intuitively to create artworks[2.B]
develop manipulative skills when drawing, painting, printmaking, and constructing artworks, using a variety of materials[2.C]
identify simple subjects expressed in artworks[3.A]
relate art to everyday life[3.C]
express ideas about personal artworks[4.A]
use prior knowledge and experiences to understand meanings in English.[ELP.1A]
speak using learning strategies such as requesting assistance, employing non-verbal cues, and using synonyms and circumlocution (conveying ideas by defining or describing when exact English words are not known).[ELP.1D]
Title of Project: Shape Monkey Landscape
Lesson Content Objective(s):
- Students will be able to create lines and shapes.
- Draw a simple body with arms, legs, head and torso with some form (not stick)
- Draw a face that includes eyes, ears, nose, mouth, neck and hair
- Draw a composition that fills the page
- Students learn about Artist Henri Rousseau and his jungle monkey paintings.
Lesson Language Objective(s):
- Students will be able to create symmetrical balance through making a face.
Instructional Plan:
Engage: Discuss how symmetrical balance means same on both sides.
Explore: Discuss Artist Henri Rousseau and his jungle monkey paintings.
Explain: Read Henri Rousseau book.
Eleborate:
- Students first draw a circle for a head.
- Students add a heart inside the circle to form the inside of the monkey’s head.
- Students add two ovals for eyes with a triangle inside the oval.
- Students add an oval nose.
- Then students add two ovals for ears on the side of the head.
- Students add a U for the mouth.
- Then students add a body, arms, and legs.
- Students decide on a background to place their monkey in forming trees, flowers, bugs, and other monkeys.
Evaluate: Students show their monkey and discuss how they created symmetrical balance with shapes on its face.
Art, Kindergarten
glean information from the environment, using the five senses[1.A]
identify colors, textures, forms, and subjects in the environment[1.B]
create artworks, using a variety of colors, forms, and lines[2.A]
arrange forms intuitively to create artworks[2.B]
develop manipulative skills when drawing, painting, printmaking, and constructing artworks, using a variety of materials[2.C]
identify simple subjects expressed in artworks[3.A]
express ideas about personal artworks[4.A]
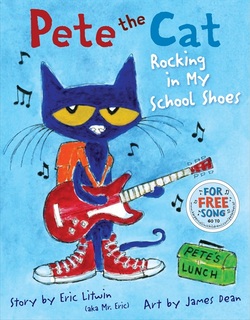
Title of Project: Pete the Cat
Lesson Content Objective(s):
Instructional Plan:
Engage: Read Pete the Cat by Eric Litwin.
Explore: Discuss how an illustrator is a job in art.
Explain: Discuss the different room that they saw in the book. Review basic shapes, lines and movement.
Eleborate:
Evaluate: Students show their pictures to the class and tell about their favorite room.
glean information from the environment, using the five senses[1.A]
identify colors, textures, forms, and subjects in the environment[1.B]
create artworks, using a variety of colors, forms, and lines[2.A]
arrange forms intuitively to create artworks[2.B]
develop manipulative skills when drawing, painting, printmaking, and constructing artworks, using a variety of materials[2.C]
identify simple subjects expressed in artworks[3.A]
express ideas about personal artworks[4.A]
Title of Project: Pete the Cat
Lesson Content Objective(s):
- Students reflect on different places in the school building.
- Students will be able to create animals that show movement in a picture.
- Students will be able to create lines and shapes.
- Students will be able to identify a job in art/ illustrator.
- Students will identify their basic shapes and lines.
Instructional Plan:
Engage: Read Pete the Cat by Eric Litwin.
Explore: Discuss how an illustrator is a job in art.
Explain: Discuss the different room that they saw in the book. Review basic shapes, lines and movement.
Eleborate:
- Go step by step how to draw the cat
- Discuss their favorite room in the school and show how to draw a room.
- Go step by step how to paint the cat and the room in their picture.
Evaluate: Students show their pictures to the class and tell about their favorite room.


Art, Kindergarten
glean information from the environment, using the five senses[1.A]
identify colors, textures, forms, and subjects in the environment[1.B]
create artworks, using a variety of colors, forms, and lines[2.A]
arrange forms intuitively to create artworks[2.B]
develop manipulative skills when drawing, painting, printmaking, and constructing artworks, using a variety of materials[2.C]
relate art to everyday life[3.C]
express ideas about original artworks, portfolios, and exhibitions by peers and artists[4.B]
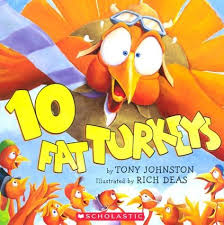
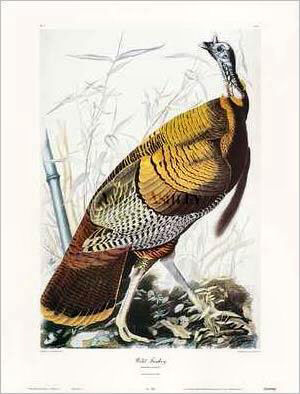
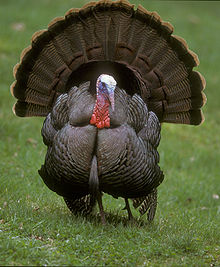
Title of Project: Hand Turkey
Lesson Content Objective(s):
Although Audubon had no role in the organization that bears his name, there is a connection: George Bird Grinnell, one of the founders of the early Audubon Society in the late 1800s, was tutored by Lucy Audubon, John James's widow. Knowing Audubon's reputation, Grinnell chose his name as the inspiration for the organization's earliest work to protect birds and their habitats. Today, the name Audubon remains synonymous with birds and bird conservation the world over.
Lesson Language Objective(s):
Students learn about how an actual texture you can feel.Students review their primary and secondary colors.
Students learn how a portrait can also be an animal.
Resources/materials: paper, crayons, tempera paint, glue, feathers
Instructional Plan:
Engage: Read the book 10 Fat turkeys.
Explore: Discuss the shapes and colors we saw in the book. And the different things that the turkeys did in the story.
Explain: Students trace their hand at least 5 times.
Eleborate: Students then make the turkey’s head out of their thumb and other fingers for their feathers.
Students add details that the turkeys did for example the bubble gum turkey, the roller skate turkey, & the pogo turkey.
Students make an environment for their turkey to live in.
Student paint in their turkeys and background in their picture.
Students glue feathers onto their hand to show texture in their turkeys.
Assessment:
Evaluate: Students discuss their pictures talk about how the feather texture feels. Then discuss the turkeys they made and what was in their turkey’s environment.
glean information from the environment, using the five senses[1.A]
identify colors, textures, forms, and subjects in the environment[1.B]
create artworks, using a variety of colors, forms, and lines[2.A]
arrange forms intuitively to create artworks[2.B]
develop manipulative skills when drawing, painting, printmaking, and constructing artworks, using a variety of materials[2.C]
relate art to everyday life[3.C]
express ideas about original artworks, portfolios, and exhibitions by peers and artists[4.B]
Title of Project: Hand Turkey
Lesson Content Objective(s):
- Students review square, rectangle, triangle, and circle shapes and learn colors.
- Students learn about turkeys.
- Review textures and what they are and how they are in our environment.
Although Audubon had no role in the organization that bears his name, there is a connection: George Bird Grinnell, one of the founders of the early Audubon Society in the late 1800s, was tutored by Lucy Audubon, John James's widow. Knowing Audubon's reputation, Grinnell chose his name as the inspiration for the organization's earliest work to protect birds and their habitats. Today, the name Audubon remains synonymous with birds and bird conservation the world over.
Lesson Language Objective(s):
Students learn about how an actual texture you can feel.Students review their primary and secondary colors.
Students learn how a portrait can also be an animal.
Resources/materials: paper, crayons, tempera paint, glue, feathers
Instructional Plan:
Engage: Read the book 10 Fat turkeys.
Explore: Discuss the shapes and colors we saw in the book. And the different things that the turkeys did in the story.
Explain: Students trace their hand at least 5 times.
Eleborate: Students then make the turkey’s head out of their thumb and other fingers for their feathers.
Students add details that the turkeys did for example the bubble gum turkey, the roller skate turkey, & the pogo turkey.
Students make an environment for their turkey to live in.
Student paint in their turkeys and background in their picture.
Students glue feathers onto their hand to show texture in their turkeys.
Assessment:
Evaluate: Students discuss their pictures talk about how the feather texture feels. Then discuss the turkeys they made and what was in their turkey’s environment.
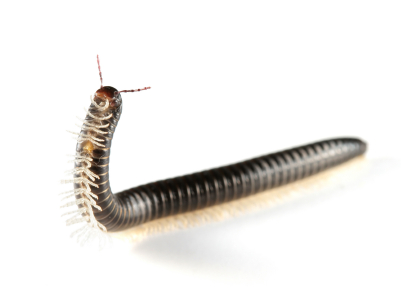
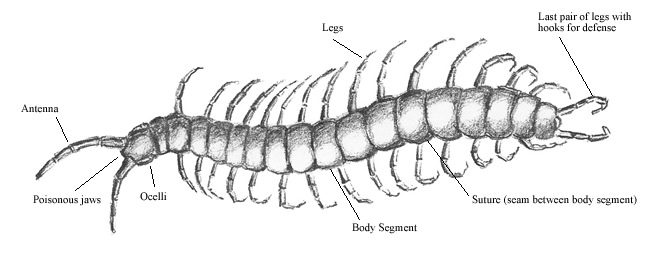
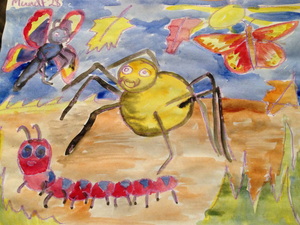
Art, Kindergarten
glean information from the environment, using the five senses[1.A]
identify colors, textures, forms, and subjects in the environment[1.B]
create artworks, using a variety of colors, forms, and lines[2.A]
arrange forms intuitively to create artworks[2.B]
identify simple subjects expressed in artworks[3.A]
relate art to everyday life[3.C]
express ideas about personal artworks[4.A]
use prior knowledge and experiences to understand meanings in English.[ELP.1A]
speak using learning strategies such as requesting assistance, employing non-verbal cues, and using synonyms and circumlocution (conveying ideas by defining or describing when exact English words are not known).[ELP.1D]
Title of Project: Spiders and insects
Lesson Content Objective(s):
Instructional Plan:
Engage: Read Little Miss Spider by David Kirk.
Explore: Insects may be regarded as pest because some bite, sting, spread disease, or eat crops, but without insects we would starve. Crops that we rely on for food require pollination by insects. In many countries, insects themselves are food! Silk, shellac, and honey come from insects. Beneficial insects control harmful insects. Insects help to recycle organic materials and give us nitrogen and other important nutrients.
Explain: Spiders are arachnids with eight legs, insects are bugs with six legs, and Millipede are bugs with many legs.
Eleborate:
Evaluate: Students show explain how each on of their bugs is different.
glean information from the environment, using the five senses[1.A]
identify colors, textures, forms, and subjects in the environment[1.B]
create artworks, using a variety of colors, forms, and lines[2.A]
arrange forms intuitively to create artworks[2.B]
identify simple subjects expressed in artworks[3.A]
relate art to everyday life[3.C]
express ideas about personal artworks[4.A]
use prior knowledge and experiences to understand meanings in English.[ELP.1A]
speak using learning strategies such as requesting assistance, employing non-verbal cues, and using synonyms and circumlocution (conveying ideas by defining or describing when exact English words are not known).[ELP.1D]
Title of Project: Spiders and insects
Lesson Content Objective(s):
- Students learn about the five senses and how it relates to bugs.
- Review textures and what they are and how they are in our environment.
- Students learn about bugs and what is an insect.
- Students learn about shades.
- Students review square, rectangle, triangle, and circle shapes and learn colors.
- Students learn about primary and secondary colors.
- Students learn about shades.
Instructional Plan:
Engage: Read Little Miss Spider by David Kirk.
Explore: Insects may be regarded as pest because some bite, sting, spread disease, or eat crops, but without insects we would starve. Crops that we rely on for food require pollination by insects. In many countries, insects themselves are food! Silk, shellac, and honey come from insects. Beneficial insects control harmful insects. Insects help to recycle organic materials and give us nitrogen and other important nutrients.
Explain: Spiders are arachnids with eight legs, insects are bugs with six legs, and Millipede are bugs with many legs.
Eleborate:
- Students create a spider.
- Students create an insect.
- Students create a Millipede insect.
Evaluate: Students show explain how each on of their bugs is different.
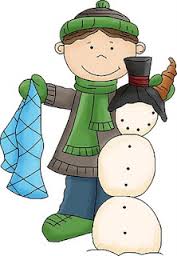
Art, Kindergarten
glean information from the environment, using the five senses[1.A]
identify colors, textures, forms, and subjects in the environment[1.B]
create artworks, using a variety of colors, forms, and lines[2.A]
arrange forms intuitively to create artworks[2.B]
develop manipulative skills when drawing, painting, printmaking, and constructing artworks, using a variety of materials[2.C]
identify simple subjects expressed in artworks[3.A]
relate art to everyday life[3.C]
express ideas about personal artworks[4.A]
Title of Project: Fall Self-Portrait
Lesson Content Objective(s):
Resources/materials: 12x18 construction paper, tempera paint, leaf print
Project Objective:
Students will create a self portrait creating feeling of cold with the clothing and wind and leaves.
Instructional Plan:
Engage: First I talk about portaits past and present and clothing.
Explore: 1. With your paper in the vertical position, Students pick either peach or brown for their skin and create a circle for a face.
Explain:
2. Students then add a red rectangle for a body and rectangles for sleeves.
3. Students add a green scarf, mittens, and a hat.
4. Students add blue strips on their hat and scarf.
Eleborate:
6. Students paint eyes, nose, mouth on their face.
7. Students print falling leaves with yellow, red, orange, and brown.
Assessment:
Evaluate: Students show and tell their portraits.
glean information from the environment, using the five senses[1.A]
identify colors, textures, forms, and subjects in the environment[1.B]
create artworks, using a variety of colors, forms, and lines[2.A]
arrange forms intuitively to create artworks[2.B]
develop manipulative skills when drawing, painting, printmaking, and constructing artworks, using a variety of materials[2.C]
identify simple subjects expressed in artworks[3.A]
relate art to everyday life[3.C]
express ideas about personal artworks[4.A]
Title of Project: Fall Self-Portrait
Lesson Content Objective(s):
- Students review square, rectangle, triangle, and circle shapes.
- Students learn about colors.
- Students learn how to draw characters and background for their pictures.
- Students learn how to use tempera.
- Students learn about portraits and prints.
- Students learn about primary and secondary colors.
- Students learn about lines and shapes.
- Students learn about fall.
Resources/materials: 12x18 construction paper, tempera paint, leaf print
Project Objective:
Students will create a self portrait creating feeling of cold with the clothing and wind and leaves.
Instructional Plan:
Engage: First I talk about portaits past and present and clothing.
Explore: 1. With your paper in the vertical position, Students pick either peach or brown for their skin and create a circle for a face.
Explain:
2. Students then add a red rectangle for a body and rectangles for sleeves.
3. Students add a green scarf, mittens, and a hat.
4. Students add blue strips on their hat and scarf.
Eleborate:
6. Students paint eyes, nose, mouth on their face.
7. Students print falling leaves with yellow, red, orange, and brown.
Assessment:
Evaluate: Students show and tell their portraits.
Art, Kindergarten
glean information from the environment, using the five senses[1.A]
identify colors, textures, forms, and subjects in the environment[1.B]
create artworks, using a variety of colors, forms, and lines[2.A]
arrange forms intuitively to create artworks[2.B]
identify simple subjects expressed in artworks[3.A]
express ideas about personal artworks[4.A]
use prior knowledge and experiences to understand meanings in English.[ELP.1A]
speak using learning strategies such as requesting assistance, employing non-verbal cues, and using synonyms and circumlocution (conveying ideas by defining or describing when exact English words are not known).[ELP.1D]
Title of Project: Rainbow Fish Seascape
Lesson Content Objective(s):
Instructional Plan:
Engage: Read: Rainbow fish.
Explore: Talk about the colors, lines, shapes, and patterns in the underwater seascape that are in the book.
Explain: Step by step draw of to create a fish. Together will draw the oval, circles, and triangles that make up the fish.
Eleborate: Students then add patterned scales and an undersea background. Learning how to mix colors.
Assessment:
Evaluate: Students show their pictures and discuss what they have added to their background.
glean information from the environment, using the five senses[1.A]
identify colors, textures, forms, and subjects in the environment[1.B]
create artworks, using a variety of colors, forms, and lines[2.A]
arrange forms intuitively to create artworks[2.B]
identify simple subjects expressed in artworks[3.A]
express ideas about personal artworks[4.A]
use prior knowledge and experiences to understand meanings in English.[ELP.1A]
speak using learning strategies such as requesting assistance, employing non-verbal cues, and using synonyms and circumlocution (conveying ideas by defining or describing when exact English words are not known).[ELP.1D]
Title of Project: Rainbow Fish Seascape
Lesson Content Objective(s):
- Students will be able to create lines and shapes.
- Students will be able to create patterns color and shapes.
- Students will identify their basic shapes and lines.
- Students will be able to create fish that show movement in a seascape picture.
- Students learn about primary and secondary colors.
Instructional Plan:
Engage: Read: Rainbow fish.
Explore: Talk about the colors, lines, shapes, and patterns in the underwater seascape that are in the book.
Explain: Step by step draw of to create a fish. Together will draw the oval, circles, and triangles that make up the fish.
Eleborate: Students then add patterned scales and an undersea background. Learning how to mix colors.
Assessment:
Evaluate: Students show their pictures and discuss what they have added to their background.
| wayne_thiebuad.ppt |
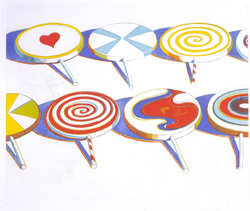 Wayne Thiebaud
Art, Kindergarten
identify colors, textures, forms, and subjects in the environment[1.B]
create artworks, using a variety of colors, forms, and lines[2.A]
arrange forms intuitively to create artworks[2.B]
develop manipulative skills when drawing, painting, printmaking, and constructing artworks, using a variety of materials[2.C]
identify simple subjects expressed in artworks[3.A]
relate art to everyday life[3.C]
express ideas about personal artworks[4.A]
Title of Project: Pumpkin and Apples
Lesson Content Objective(s):
Instructional Plan:
Engage: Read Dappled Apples.
Explore: Talk about food that they eat in the fall. Review basic shapes and the names of lines.
Explain: Review painting and how to use watercolors. Show Artist Wayne Thiebaud candy and ice cream pictures.
Eleborate: Students draw a basket and draw line patterns on their basket.
Students then draw apples and pumpkins in their basket also adding in any of their favorite food they eat in October.
Students add themselves in their picture.
Assessment:
Evaluate: Students show their pictures and talk about the food they eat during the fall season.
All Lesson also on weebly: smundt.weebly.com
identify colors, textures, forms, and subjects in the environment[1.B]
create artworks, using a variety of colors, forms, and lines[2.A]
arrange forms intuitively to create artworks[2.B]
develop manipulative skills when drawing, painting, printmaking, and constructing artworks, using a variety of materials[2.C]
identify simple subjects expressed in artworks[3.A]
relate art to everyday life[3.C]
express ideas about personal artworks[4.A]
Title of Project: Pumpkin and Apples
Lesson Content Objective(s):
- Students review basic shapes and lines.
- Students relate art to food they eat in October.
- Students learn how to cut out shapes on a line.
- Learn to cut out shapes to make objects
- Fill in an outline with color.
- Review pattern and learn how they can have repetitions.
- Students learn about artist Wayne Thiebaud.
- Students learn about still lifes.
- Students learn about primary and secondary colors.
Instructional Plan:
Engage: Read Dappled Apples.
Explore: Talk about food that they eat in the fall. Review basic shapes and the names of lines.
Explain: Review painting and how to use watercolors. Show Artist Wayne Thiebaud candy and ice cream pictures.
Eleborate: Students draw a basket and draw line patterns on their basket.
Students then draw apples and pumpkins in their basket also adding in any of their favorite food they eat in October.
Students add themselves in their picture.
Assessment:
Evaluate: Students show their pictures and talk about the food they eat during the fall season.
All Lesson also on weebly: smundt.weebly.com
Art, Kindergarten
glean information from the environment, using the five senses[1.A]
identify colors, textures, forms, and subjects in the environment[1.B]
create artworks, using a variety of colors, forms, and lines[2.A]
arrange forms intuitively to create artworks[2.B]
develop manipulative skills when drawing, painting, printmaking, and constructing artworks, using a variety of materials[2.C]
relate art to everyday life[3.C]
express ideas about personal artworks[4.A]
use prior knowledge and experiences to understand meanings in English.[ELP.1A]
speak using learning strategies such as requesting assistance, employing non-verbal cues, and using synonyms and circumlocution (conveying ideas by defining or describing when exact English words are not known).[ELP.1D]
Title of Project: Primary and Secondary Colors Degas Scarecrow
Lesson Content Objective(s):
Instructional Plan:
Engage: Talks about primary colors discuss how primary colors make secondary colors and how we can make them with watercolor markers.
Explore: Review how to make simple body with arms, legs, head and torso with some form (not stick) on a scarecrow. Draw a face that includes eyes, ears, nose, mouth, neck and hair.
Explain: · Students draw a scarecrow with crayons.
Eleborate: · Student’s color in the face with yellow and add yellow dots at his feet for corn, and yellow circle for a moon
· Students give him red overalls.
· Student’s mix red & yellow to make orange and create straw for their scarecrow.
· Students color in their shirt blue.
· Students mix yellow and blue to get green for their cornhusks.
· Students mix red and blue to get purple for their sky.
Assessment:
Evaluate: Students’ show and tell about mixing colors and if the were able to create a scarecrow that wasn’t stick.
glean information from the environment, using the five senses[1.A]
identify colors, textures, forms, and subjects in the environment[1.B]
create artworks, using a variety of colors, forms, and lines[2.A]
arrange forms intuitively to create artworks[2.B]
develop manipulative skills when drawing, painting, printmaking, and constructing artworks, using a variety of materials[2.C]
relate art to everyday life[3.C]
express ideas about personal artworks[4.A]
use prior knowledge and experiences to understand meanings in English.[ELP.1A]
speak using learning strategies such as requesting assistance, employing non-verbal cues, and using synonyms and circumlocution (conveying ideas by defining or describing when exact English words are not known).[ELP.1D]
Title of Project: Primary and Secondary Colors Degas Scarecrow
Lesson Content Objective(s):
- Students learn how to mix colors.
- Students learn how to use paint correctly.
- Students learn how to draw characters and environments for their pictures.
- Draw a simple body with arms, legs, head and torso with some form (not stick).
- Draw a face that includes eyes, ears, nose, mouth, neck and hair
- Draw a composition that fills the page
- Students review square, rectangle, triangle, and circle shapes.
- Students learn about primary and secondary colors.
Instructional Plan:
Engage: Talks about primary colors discuss how primary colors make secondary colors and how we can make them with watercolor markers.
Explore: Review how to make simple body with arms, legs, head and torso with some form (not stick) on a scarecrow. Draw a face that includes eyes, ears, nose, mouth, neck and hair.
Explain: · Students draw a scarecrow with crayons.
Eleborate: · Student’s color in the face with yellow and add yellow dots at his feet for corn, and yellow circle for a moon
· Students give him red overalls.
· Student’s mix red & yellow to make orange and create straw for their scarecrow.
· Students color in their shirt blue.
· Students mix yellow and blue to get green for their cornhusks.
· Students mix red and blue to get purple for their sky.
Assessment:
Evaluate: Students’ show and tell about mixing colors and if the were able to create a scarecrow that wasn’t stick.
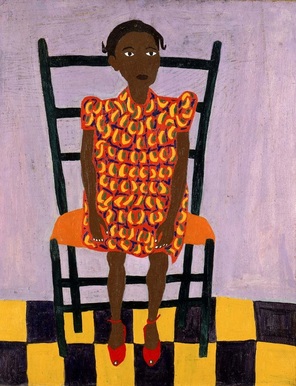 William H. Johnson Little Girl in Orange
Art, Kindergarten
glean information from the environment, using the five senses[1.A]
identify colors, textures, forms, and subjects in the environment[1.B]
create artworks, using a variety of colors, forms, and lines[2.A]
arrange forms intuitively to create artworks[2.B]
relate art to everyday life[3.C]
share ideas about personal artworks and the work of others, demonstrating respect for differing opinions[3.B]
express ideas about original artworks, portfolios, and exhibitions by peers and artists[4.B]
Title of Project: Self-Portrait
Lesson Content Objective(s):
Lesson Language Objective(s):
Resources/materials: Modeling clay, crayons, rubbing plates
Instructional Plan:
Engage: Demonstrate how to draw a simple body with arms, legs, head and torso with some form (not stick).
Explore: Draw a face that includes eyes, ears, nose, mouth, neck and hair. Demonstrate how to change pressure with a crayon.
Explain: Demonstrate how to add texture to an artwork with texture plates. Demonstrate how to make patterns and repetition in an artwork.
Eleborate:
· Students create a face out of clay, learning the lines.
· Students draw eyes, nose, mouth, ears on their self-portrait.
· Then draw a simple body with arms, legs, head and torso with some form (not stick) adding clothing.
· Students add patterns and textures to their picture.
Assessment:
Evaluate: Students show their self-portraits.
All Lesson also on weebly: smundt.weebly.com
glean information from the environment, using the five senses[1.A]
identify colors, textures, forms, and subjects in the environment[1.B]
create artworks, using a variety of colors, forms, and lines[2.A]
arrange forms intuitively to create artworks[2.B]
relate art to everyday life[3.C]
share ideas about personal artworks and the work of others, demonstrating respect for differing opinions[3.B]
express ideas about original artworks, portfolios, and exhibitions by peers and artists[4.B]
Title of Project: Self-Portrait
Lesson Content Objective(s):
- Students learn about artist William H. Johnson Little Girl in Orange.
- Draw a simple body with arms, legs, head and torso with some form (not stick).
- Draw a face that includes eyes, ears, nose, mouth, neck and hair
- Draw a composition that fills the page
- Demonstrate how to change pressure with a crayon
- Demonstrate how to add texture to an artwork.
Lesson Language Objective(s):
- Students learn patterns and repetition.
- Students learn about self-portraits.
Resources/materials: Modeling clay, crayons, rubbing plates
Instructional Plan:
Engage: Demonstrate how to draw a simple body with arms, legs, head and torso with some form (not stick).
Explore: Draw a face that includes eyes, ears, nose, mouth, neck and hair. Demonstrate how to change pressure with a crayon.
Explain: Demonstrate how to add texture to an artwork with texture plates. Demonstrate how to make patterns and repetition in an artwork.
Eleborate:
· Students create a face out of clay, learning the lines.
· Students draw eyes, nose, mouth, ears on their self-portrait.
· Then draw a simple body with arms, legs, head and torso with some form (not stick) adding clothing.
· Students add patterns and textures to their picture.
Assessment:
Evaluate: Students show their self-portraits.
All Lesson also on weebly: smundt.weebly.com
Art, Kindergarten
glean information from the environment, using the five senses[1.A]
identify colors, textures, forms, and subjects in the environment[1.B]
create artworks, using a variety of colors, forms, and lines[2.A]
arrange forms intuitively to create artworks[2.B]
develop manipulative skills when drawing, painting, printmaking, and constructing artworks, using a variety of materials[2.C]
relate art to everyday life[3.C]
identify simple subjects expressed in artworks[3.A]
express ideas about personal artworks[4.A]
use prior knowledge and experiences to understand meanings in English.[ELP.1A]
use visual, contextual, and linguistic support to enhance and confirm understanding of increasingly complex and elaborated spoken language.[ELP.2E]
Title of Project: Rubbing Plate Clown
Lesson Content Objective(s):
Lesson Language Objective(s):
Instructional Plan:
Engage: Talk about clowns and the different motions the might make.
Explore: Discuss the shapes they need to use to make a clown.
Explain: Discuss how making a background and how adding texture and design can enhance a picture.
Eleborate: 1. Students will create a clown in motion.
Demonstrate to students how to make rubbings with Crayons on construction paper. Encourage use of more than one color and the use of two or three rubbing plates from the Texture Rubbing Plate Set as background; Discuss the names of colors.
Assessment:
Evaluate: Students discuss their clowns and what motions and backgrounds they have made.
glean information from the environment, using the five senses[1.A]
identify colors, textures, forms, and subjects in the environment[1.B]
create artworks, using a variety of colors, forms, and lines[2.A]
arrange forms intuitively to create artworks[2.B]
develop manipulative skills when drawing, painting, printmaking, and constructing artworks, using a variety of materials[2.C]
relate art to everyday life[3.C]
identify simple subjects expressed in artworks[3.A]
express ideas about personal artworks[4.A]
use prior knowledge and experiences to understand meanings in English.[ELP.1A]
use visual, contextual, and linguistic support to enhance and confirm understanding of increasingly complex and elaborated spoken language.[ELP.2E]
Title of Project: Rubbing Plate Clown
Lesson Content Objective(s):
- Students learn about the five senses and how it relates to them.
- Review textures and what they are and how they are in our environment.
- Students will discover that repetition or repeating an image can make a design and background. Rubbings are images made by stroking wax crayons across paper that has been laid over a texture plate.
- Students will discover that backgrounds will enhance their drawings.
- Students will learn how to draw objects in motion.
Lesson Language Objective(s):
- Students review square, rectangle, triangle, and circle shapes and learn colors.
Instructional Plan:
Engage: Talk about clowns and the different motions the might make.
Explore: Discuss the shapes they need to use to make a clown.
Explain: Discuss how making a background and how adding texture and design can enhance a picture.
Eleborate: 1. Students will create a clown in motion.
Demonstrate to students how to make rubbings with Crayons on construction paper. Encourage use of more than one color and the use of two or three rubbing plates from the Texture Rubbing Plate Set as background; Discuss the names of colors.
Assessment:
Evaluate: Students discuss their clowns and what motions and backgrounds they have made.
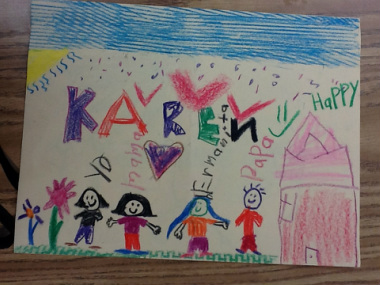
Art, Kindergarten
identify colors, textures, forms, and subjects in the environment[1.B]
create artworks, using a variety of colors, forms, and lines[2.A]
arrange forms intuitively to create artworks[2.B]
identify simple subjects expressed in artworks[3.A]
relate art to everyday life[3.C]
express ideas about personal artworks[4.A]
speak using learning strategies such as requesting assistance, employing non-verbal cues, and using synonyms and circumlocution (conveying ideas by defining or describing when exact English words are not known).[ELP.1D]
use visual, contextual, and linguistic support to enhance and confirm understanding of increasingly complex and elaborated spoken language.[ELP.2E]
Title of Project: Weather Landscape
Lesson Content Objective(s):
Instructional Plan:
Engage: Review the different types of lines and discuss the painting of Vincent Van Gogh, “ The Starry Night”
Explore: Talk about what different weather types we have. Review Lines, shapes, and the line song.
Explain: . Review how to create a house and how to color in shapes staying in the lines.
Eleborate: · Students use lines to create a landscape with a house.
· One side of their paper is a rainy day.
· The other side is a sunny day.
· Students then use crayons to fill in their shapes with color.
Assessment:
Evaluate: Students discuss their picture and tell about why they used certain lines to show the different weather patterns.
identify colors, textures, forms, and subjects in the environment[1.B]
create artworks, using a variety of colors, forms, and lines[2.A]
arrange forms intuitively to create artworks[2.B]
identify simple subjects expressed in artworks[3.A]
relate art to everyday life[3.C]
express ideas about personal artworks[4.A]
speak using learning strategies such as requesting assistance, employing non-verbal cues, and using synonyms and circumlocution (conveying ideas by defining or describing when exact English words are not known).[ELP.1D]
use visual, contextual, and linguistic support to enhance and confirm understanding of increasingly complex and elaborated spoken language.[ELP.2E]
Title of Project: Weather Landscape
Lesson Content Objective(s):
- Fill an outline with color to create a shape.
- Create a composition that fills the page.
- Label their artwork with their name
- Students indentify thin, thick, slanted, curved and zigzag lines.
- Students learn about movement in art.
Instructional Plan:
Engage: Review the different types of lines and discuss the painting of Vincent Van Gogh, “ The Starry Night”
Explore: Talk about what different weather types we have. Review Lines, shapes, and the line song.
Explain: . Review how to create a house and how to color in shapes staying in the lines.
Eleborate: · Students use lines to create a landscape with a house.
· One side of their paper is a rainy day.
· The other side is a sunny day.
· Students then use crayons to fill in their shapes with color.
Assessment:
Evaluate: Students discuss their picture and tell about why they used certain lines to show the different weather patterns.
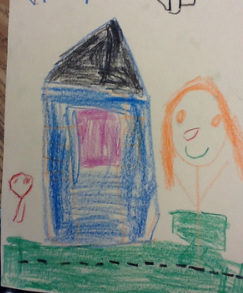
Art, Kindergarten
identify colors, textures, forms, and subjects in the environment[1.B]
create artworks, using a variety of colors, forms, and lines[2.A]
relate art to everyday life[3.C]
express ideas about original artworks, portfolios, and exhibitions by peers and artists[4.B]
use prior knowledge and experiences to understand meanings in English.[ELP.1A]
use visual, contextual, and linguistic support to enhance and confirm understanding of increasingly complex and elaborated spoken language.[ELP.2E]
Title of Project: Lines in My World
Lesson Content Objective(s):
A mark that has length and direction
Resources/materials: Crayons, Pencils, Paper, modeling clay
Instructional Plan:
Engage: Sing the horizontal-vertical-diagonal song.
Explore: And discuss what you can make with them and where they see them in everyday life.
Explain:
Evaluate: Students tell their neighbors what their houses and what lines they used.
identify colors, textures, forms, and subjects in the environment[1.B]
create artworks, using a variety of colors, forms, and lines[2.A]
relate art to everyday life[3.C]
express ideas about original artworks, portfolios, and exhibitions by peers and artists[4.B]
use prior knowledge and experiences to understand meanings in English.[ELP.1A]
use visual, contextual, and linguistic support to enhance and confirm understanding of increasingly complex and elaborated spoken language.[ELP.2E]
Title of Project: Lines in My World
Lesson Content Objective(s):
- Students learn about thin, thick, slanted, curved and zigzag lines.
- Students learn about horizontal, vertical, and diagonal lines.
- Students learn about shapes that they can make by combining horizontal, vertical, and diagonal line.
- Students learn about combining shapes to make a house or building
A mark that has length and direction
Resources/materials: Crayons, Pencils, Paper, modeling clay
Instructional Plan:
Engage: Sing the horizontal-vertical-diagonal song.
Explore: And discuss what you can make with them and where they see them in everyday life.
Explain:
- Part one: together with me: students make lines out of play-do while learning their names and discussing where they see them in everyday life. Students make a square, triangle, and rectangle.
- Part Two: Students draw their house using different lines creating a landscape.
Evaluate: Students tell their neighbors what their houses and what lines they used.
Art, Kindergarten
glean information from the environment, using the five senses[1.A]
arrange forms intuitively to create artworks[2.B]
share ideas about personal artworks and the work of others, demonstrating respect for differing opinions[3.B]
relate art to everyday life[3.C]
express ideas about personal artworks[4.A]
Title of Project: Ish / Teaching Tribes
Lesson Content Objective(s):
Line: A mark that begins at one spot and continues for a certain distance. A line has length, width, direction.
Types of lines: Straight, Curved, Zig-Zag, Broken
Resources/materials: Paper, crayons.
Instructional Plan:
Engage:Show students how to enter the room. Tell a little about me through my webpage.
Explore: Read “Ish” by Peter Reynolds. Talk about how it represents Mutual Respect.
Explain:
Active Listening: (Criss-cross applesauce, voices off, eyes forward.)
No Put Downs: (Complement others.)
Right to Pass: (To choose to share in community circle.
Eleborate: Students do a drawing representing them, showing family and favorite things.
Evaluate:Community circle game students share something about their picture.
Demonstrate how to line up.
glean information from the environment, using the five senses[1.A]
arrange forms intuitively to create artworks[2.B]
share ideas about personal artworks and the work of others, demonstrating respect for differing opinions[3.B]
relate art to everyday life[3.C]
express ideas about personal artworks[4.A]
Title of Project: Ish / Teaching Tribes
Lesson Content Objective(s):
- Students will be able to know art classroom procedures.
- Students will learn clean up procedures.
- Students will understand classroom expectations.
- Students learn how to share crayons showing mutual respect.
Line: A mark that begins at one spot and continues for a certain distance. A line has length, width, direction.
Types of lines: Straight, Curved, Zig-Zag, Broken
Resources/materials: Paper, crayons.
Instructional Plan:
Engage:Show students how to enter the room. Tell a little about me through my webpage.
Explore: Read “Ish” by Peter Reynolds. Talk about how it represents Mutual Respect.
Explain:
- Students Go over the four expectations of Ideal Classroom using:
Active Listening: (Criss-cross applesauce, voices off, eyes forward.)
No Put Downs: (Complement others.)
Right to Pass: (To choose to share in community circle.
Eleborate: Students do a drawing representing them, showing family and favorite things.
- Go over clean up procedures
Evaluate:Community circle game students share something about their picture.
Demonstrate how to line up.
